
More Information
Submitted: April 21, 2021 | Approved: March 08, 2022 | Published: March 09, 2022
How to cite this article: Pérez N, Serra C, Bou R, Ortín M, Baltasar A. Laparoscopic duodenal switch. New Insights Obes Gene Beyond. 2022; 6: 001-011.
DOI: 10.29328/journal.niogb.1001017
Copyright License: © 2022 Pérez N, et al. This is an open access article distributed under the Creative Commons Attribution License, which permits unrestricted use, distribution, and reproduction in any medium, provided the original work is properly cited.
Keywords: Obesity; Bariatric surgery; Duodenal switch; Biliopancreatic diversion

Laparoscopic duodenal switch
N Pérez, C Serra, R Bou, M Ortín and A Baltasar*
Virgen de los Lirios Hospital, Alcoy, Alicante, Spain
*Address for Correspondence: A Baltasar, Virgen de los Lirios Hospital, Alcoy, Alicante, Spain, Email: abtorrejon44@gmail.com
Laparoscopic biliopancreatic diversion with duodenal switch (BPD-DS) is a technically challenging operation that requires extensive surgical dissection, transection and restoration of intestinal continuity, and advanced laparoscopic suturing skills.
The duodenal switch (DS) procedure was described by DeMeester [1] and colleagues in 1987 as a surgical solution for primary bile reflux gastritis or to decrease the post gastrectomy symptoms seen in patients after distal gastrectomy and gastroduodenostomy.
In 1988, Hess and Marceau [2] adapted this procedure to the treatment of morbid obesity by adding a 75% longitudinal gastrectomy to reduce gastric capacity and acid production and extending the Roux limb to a length similar to that recommended by Scopinaro to induce fat malabsorption. Gagner [3] was the 1st to perform the DS by laparoscopy in September 1999 and Baltasar did so in May 2000. The biliopancreatic diversion with duodenal switch (BPD-DS) combines a Sleeve gastrectomy with a duodenal-ileal switch.
This results in a restricted caloric intake and diversion of bile and pancreatic secretions to induce fat malabsorption. Despite quite favorable outcomes reported in the literature, the BPD-DS procedure has not been worldwide spread.
There are 3 reasons for this. 1st, there is a perception that its malabsorptive component may be associated with metabolic complications, protein caloric malnutrition, or other nutritional deficiencies. 2nd, the procedure is longer and technically more demanding than other bariatric operations. And 3rd, the procedure is difficult to perform laparoscopically.
Indications
1. As a primary weight loss procedure in patients with BMI > 50 and metabolic syndrome.
2. As a 2nd step in super obese (BMI > 50) and super-super obese (BMI > 60) patients when maximum weight loss has reached the plateau, one year or one year and a half after the sleeve gastrectomy (SG).
3. In case of weight regain after an SG operation.
Preoperative preparation
Preoperative management of bariatric patients is performed by a multidisciplinary team that includes surgeons, endocrinologists, dieticians, anesthetists, physiotherapists, and psychiatrists, who combine medical, nutritional, and endocrine workup to evaluate potential surgical candidates.
Preoperative assessment includes abdominal ultrasound, biochemical evaluation of the nutritional status, respiratory physiotherapy, and in selected cases polysomnography, upper GI contrast study, and esophagus-gastro-duodenoscopy.
All bariatric patients follow routine preoperative preparation including antibiotic and acid broncho-aspiration prophylaxis and are admitted to the hospital the afternoon before the surgery.
Anesthesia
Laparoscopic BPD-DS is performed under general anesthesia and endotracheal intubation. The patient is placed in a French position with sequential compression stockings, and a special operating-room table fixation is used routinely.
Surgical technique
Instrumentation
1. One 12 mm (Endopath), one 10 mm (camera trocar), and four 5 mm trocars
2. Nathanson liver retractor
3. 0º and 30º scope
4. Harmonic scalpel (Harmonic Ethicon ACE® 7 laparoscopic shears 36 cm)
5. Four atraumatic graspers
6. Laparoscopic needle holder
7. Suction irrigator device
8. Echelon Flex 60 mm (gold and green cartridges) or Covidien Signia 60 mm (violet and gold cartridges)
9. Sponges
10. Clip applicator (optional)
11. Sutures; monoplus 3/0 HR 22 mm, Optilene 2/0 2xHR C 26 (mesenteric holes), Optilene 1 HR40 (aponeurosis closure), Braided Silk 0 straight needle 60mm. (round ligament and skin), and 2/0 Cir. needle 25 mm. (anastomosis fixation).
Trocars and surgeons’ position
Six supraumbilical ports are routinely inserted. Long trocars are sometimes needed in patients who have a very thick abdominal wall. Usually, a 12 mm right subcostal trocar is inserted under direct vision four fingertips below the ribs, a 10 mm supraumbilical trocar (camera), and four 5 mm trocars on the left pararectal, right and left anterior axillary line, and subxiphoid position (Figure 1).
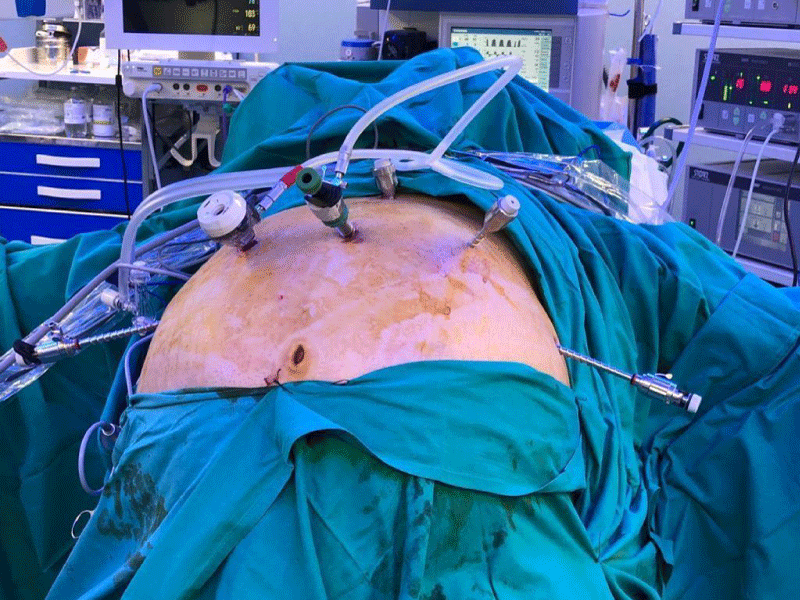
Figure 1: Trocar position.
Change position
The position of surgeons should vary depending on the step of the procedure. In the 1st part of the surgery (sleeve gastrectomy), the patient is placed in an anti-Trendelenburg position and the surgeon stands between the patient’s legs. Two monitors are used, one on each side of the patient’s head. Usually, the procedure is done with two assistants, one on either side (Figure 2). Pneumoperitoneum is set to a maximum pressure of 15 mm Hg (Figure 2).
Surgeons positions: The main surgeon is in between the patient’s legs and the assistants on each side.
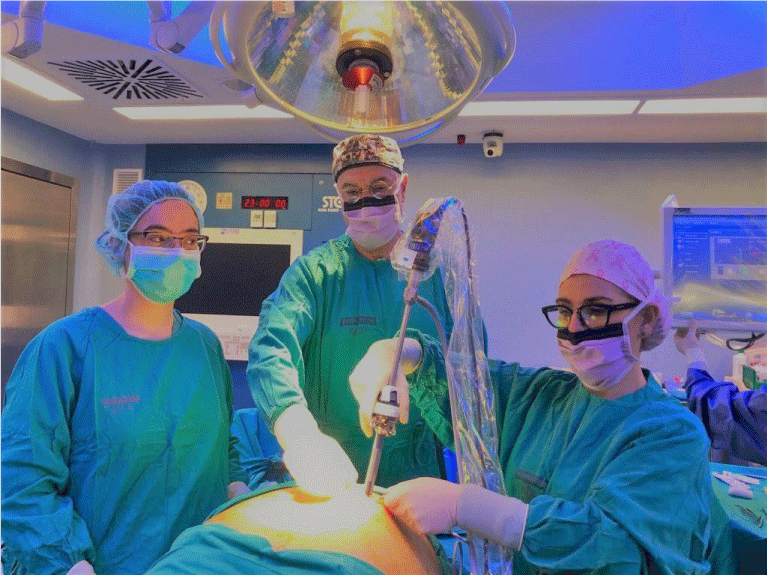
Figure 2: Surgeons position.
Procedure
Step 1-Sleeve gastrectomy: We start with a 0-silk passed by percutaneous traction of the round ligament to lift the liver. A Nathanson liver retractor is introduced through a 5 mm sub-xiphoid port to retract the liver.
Indications
1. As a primary weight loss procedure in patients with BMI > 50 and metabolic syndrome.
2. As a 2nd step in super obese (BMI > 50) and super super-obese (BMI > 60) patients when maximum weight loss has reached the plateau, one year or one year and a half after the sleeve gastrectomy (SG).
3. In case of weight regain after sleeve gastrectomy.
Preoperative preparation
Preoperative management of bariatric patients is performed by a multidisciplinary team that includes surgeons, endocrinologists, dieticians, anesthetists, physiotherapists, and psychiatrists, who combine medical, nutritional, and endocrine workup to evaluate potential surgical candidates. Preoperative assessment includes abdominal ultrasound, biochemical evaluation of the nutritional status, respiratory physiotherapy, and in selected cases polysomnography, upper GI contrast study, and esophagus-gastro-duodenoscopy [3].
All bariatric patients follow routine preoperative preparation including antibiotic and acid broncho-aspiration prophylaxis and are admitted to the hospital the afternoon before the surgery.
Trocars and surgeons’ position
Six supraumbilical ports are routinely inserted. Long trocars are sometimes needed in patients who have a very thick abdominal wall. Usually, a 12 mm right subcostal trocar is inserted under direct vision four fingertips below the ribs, a 10 mm supraumbilical trocar (camera), and four 5 mm trocars on the left pararectal, right and left anterior axillary line, and subxiphoid position (Figure 1).
Trocar position
The position of surgeons should vary depending on the step of the procedure. In the 1st part of the surgery (sleeve gastrectomy), the patient is placed in an anti-Trendelenburg position and the surgeon stands between the patient’s legs. Two monitors are used, one on each side of the patient’s head. Usually, the procedure is done with two assistants, one on either side (Figure 2).
Pneumoperitoneum is set to a maximum pressure of 15 mm Hg (Figure 2).
Procedure
Step 1 - Sleeve gastrectomy: We start with a 0-silk passed by percutaneous traction of the round ligament to lift the liver. A Nathanson liver retractor is introduced through a 5 mm sub-xiphoid port to retract the left lobe of the liver and to expose the anterior aspect of the stomach (Figures 3-6).
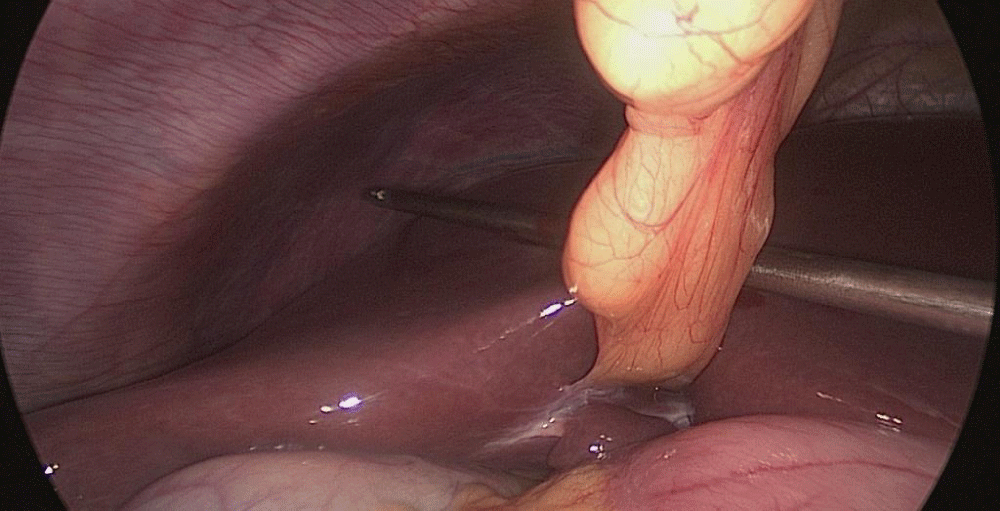
Figure 3:

Figure 4:
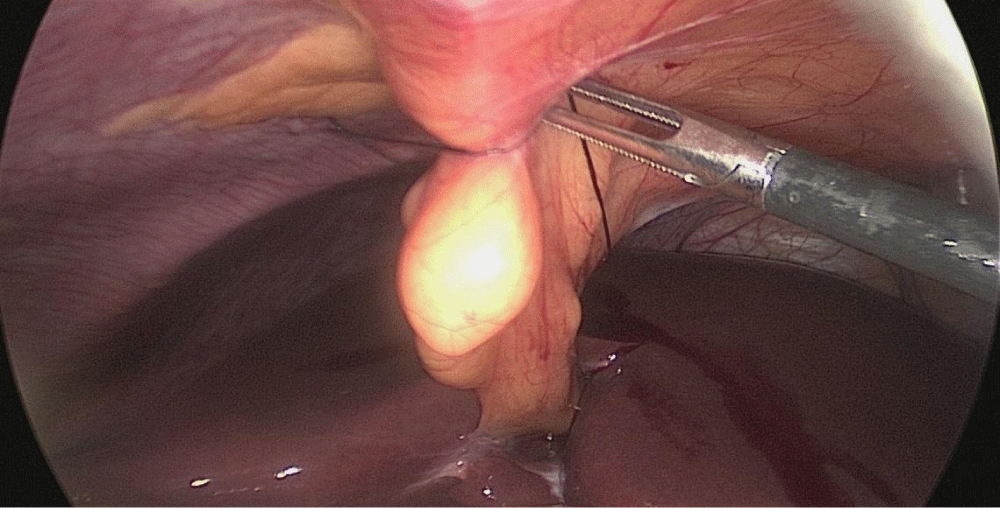
Figure 5:
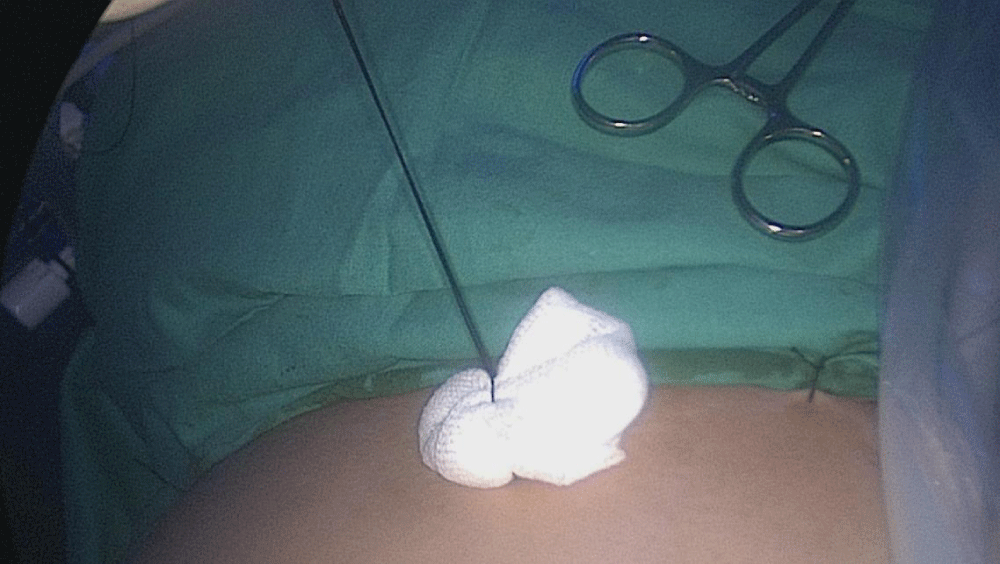
Figure 6:
Gastric resection begins by sealing the greater curvature vessels starting at the incisura angularis where is much easier to enter the lesser sac. Once we get into the lesser sac we progress upwards with the ultrasonic dissector (Harmonic-ACE, Ethicon, US).
In order to have the best view, the assistants maintain gentle traction on the greater curvature and the omentum. It is very important to cut all adhesions between the pancreas and the posterior aspect of the stomach. We continue to liberate the fundus from the left crus and the fad pad are both are released (Figures 7-14).
Now, is time to pass a 32 French size nasogastric bougie Figure 15.
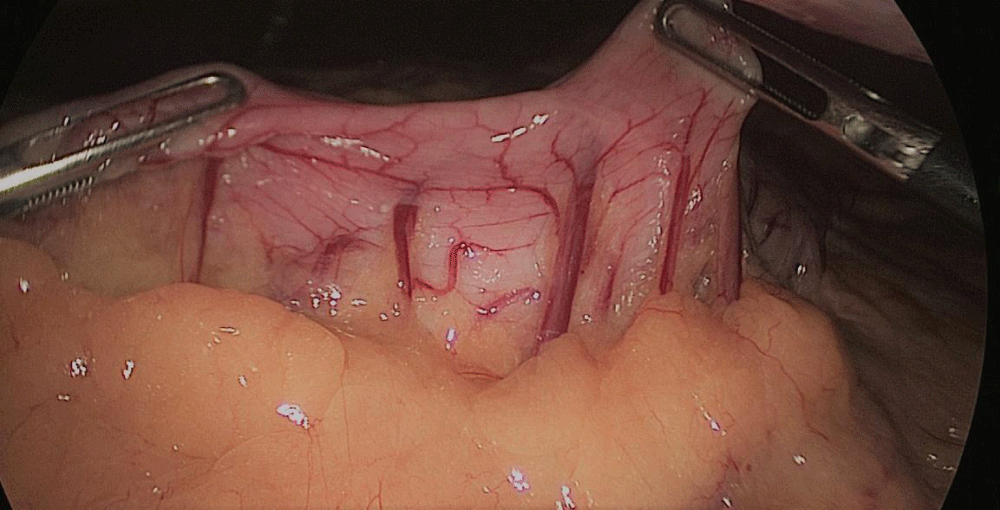
Figure 7:
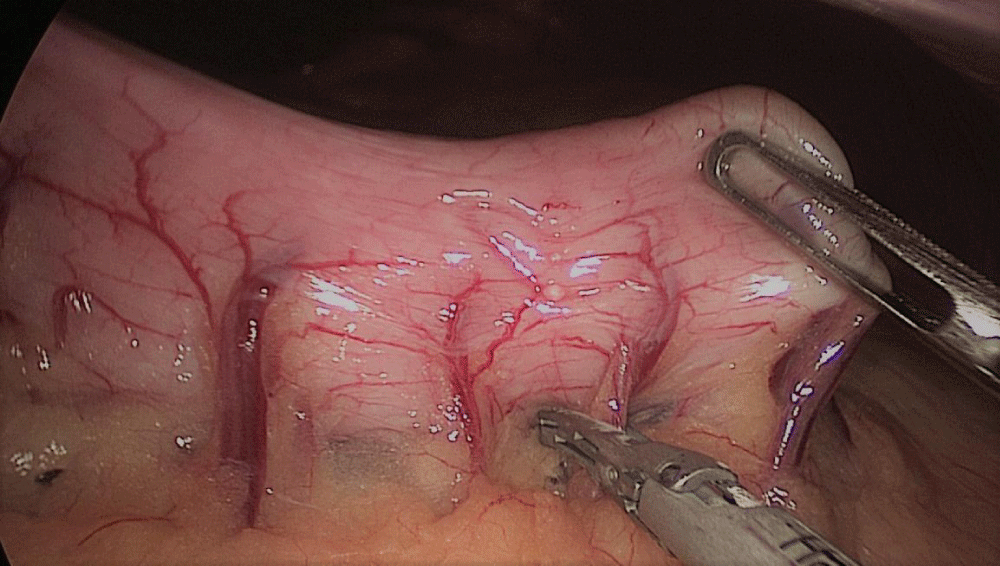
Figure 8:
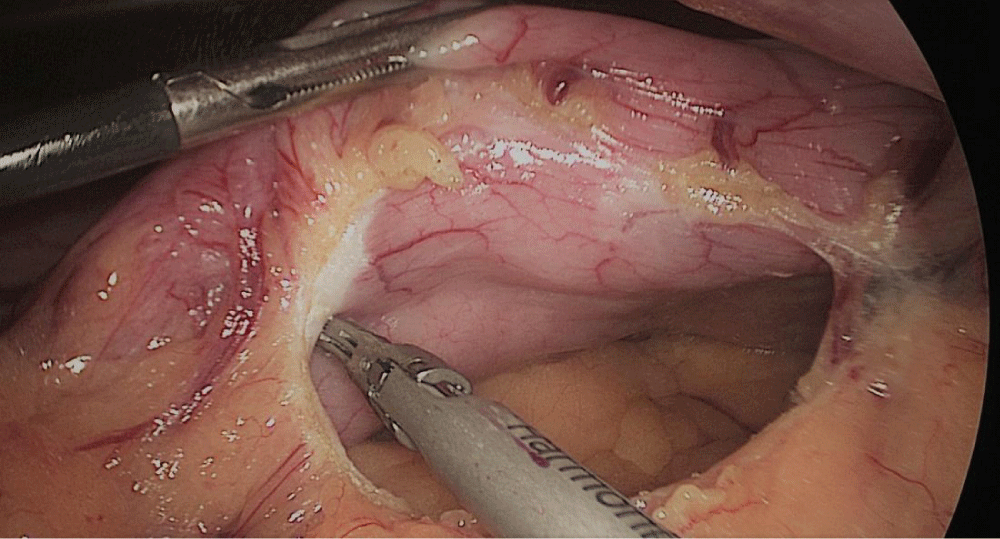
Figure 9:
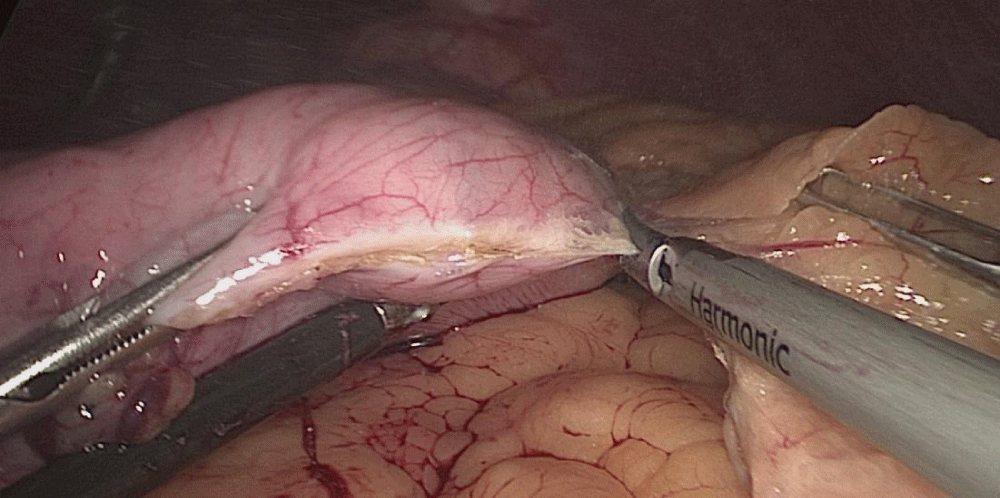
Figure 10:
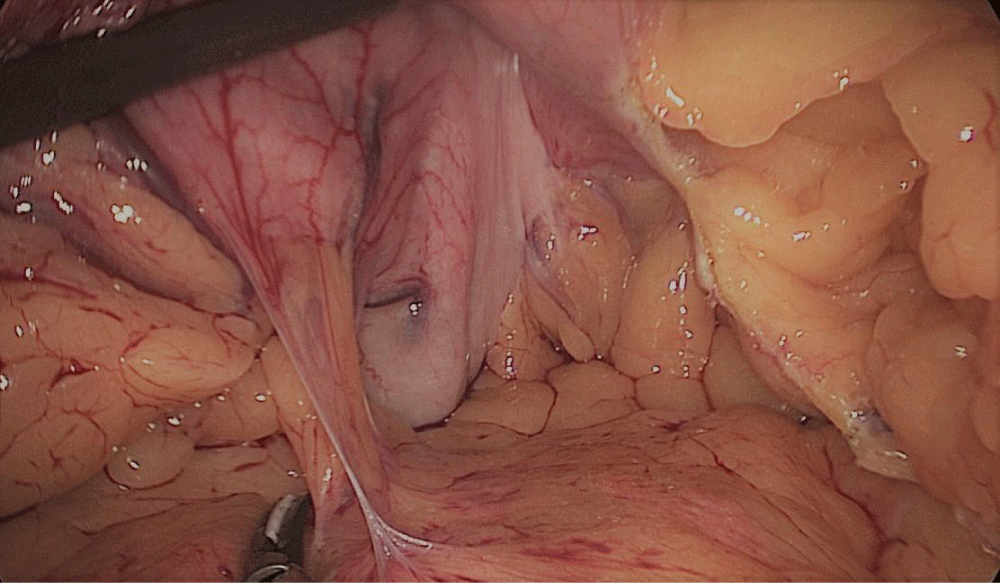
Figure 11:
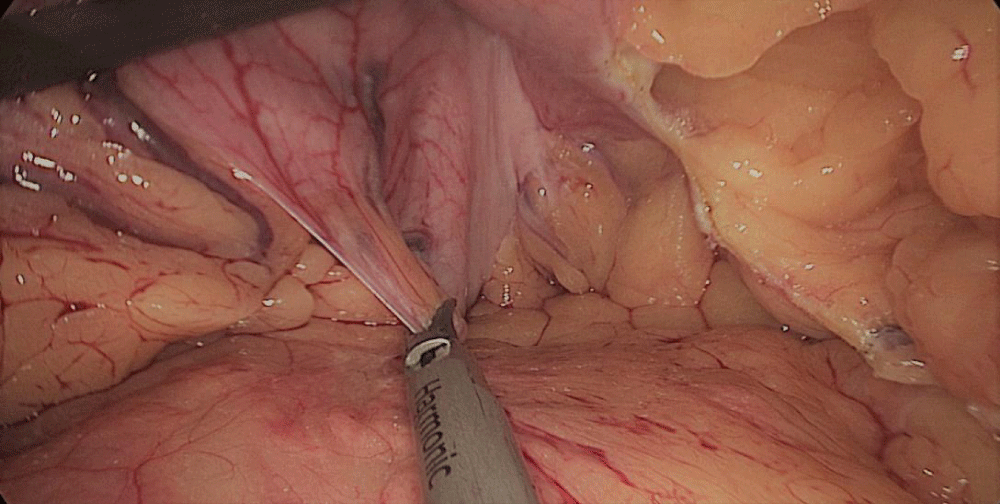
Figure 12:
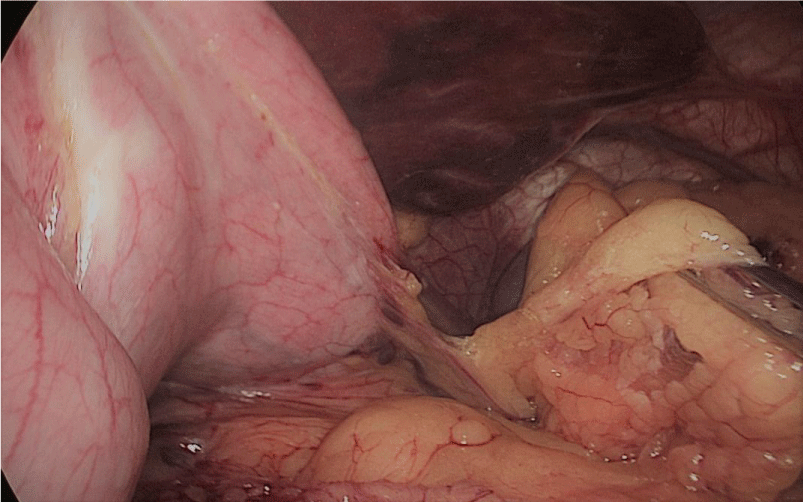
Figure 13:
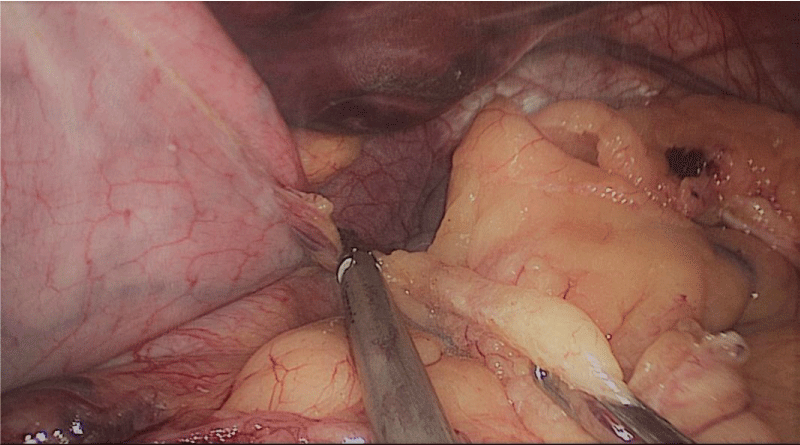
Figure 14:
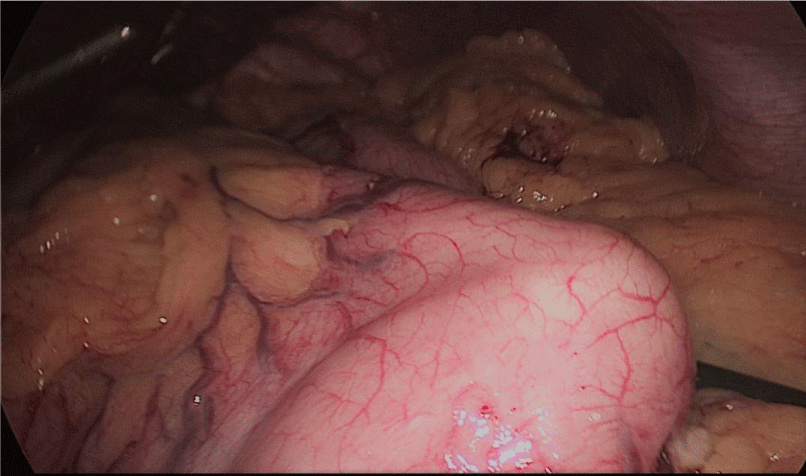
Figure 15:
The assistant on the left side continues the downwards dissection starting from the incisura angular is and then down towards and reaching the duodenum, 2 cm distal to the pylorus.
At this point, a retro-duodenal tunnel is created by gentle dissecting maneuvers starting from the inferior duodenal margin. The dissection is continued very close to the posterior wall of the duodenum, in a plane superior to the gastroduodenal artery.
During this maneuver, the surgeon and assistants lift the stomach and a little window is created in the superior margin of the duodenum on the gastro-hepatic ligament (Figures 16-23).
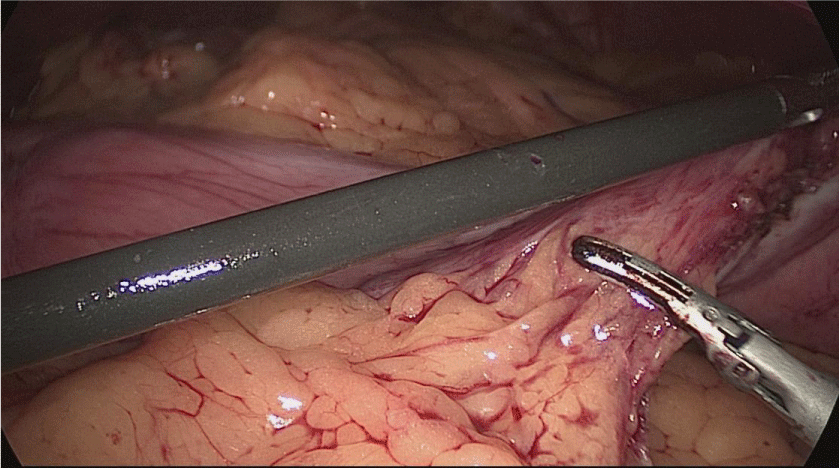
Figure 16:
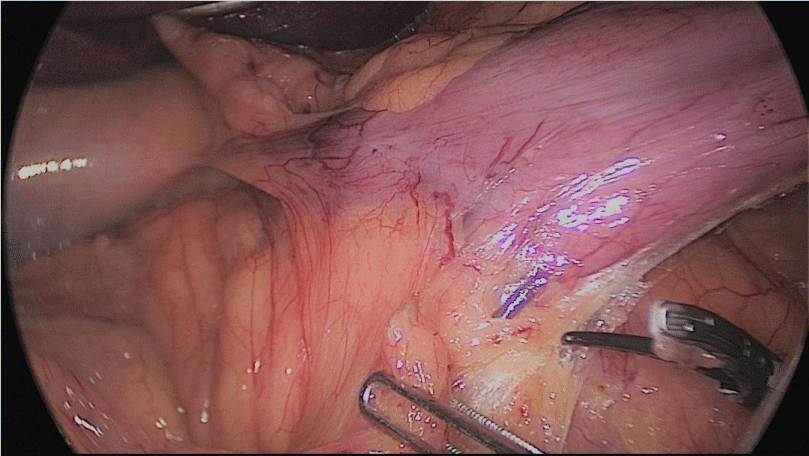
Figure 17:
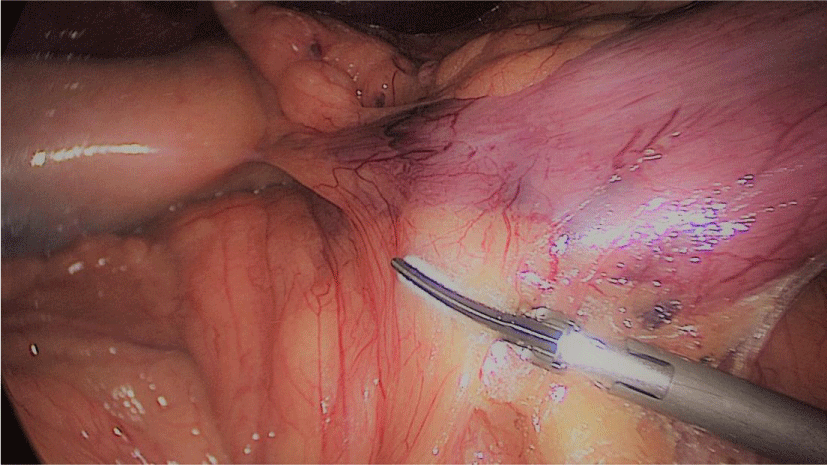
Figure 18:
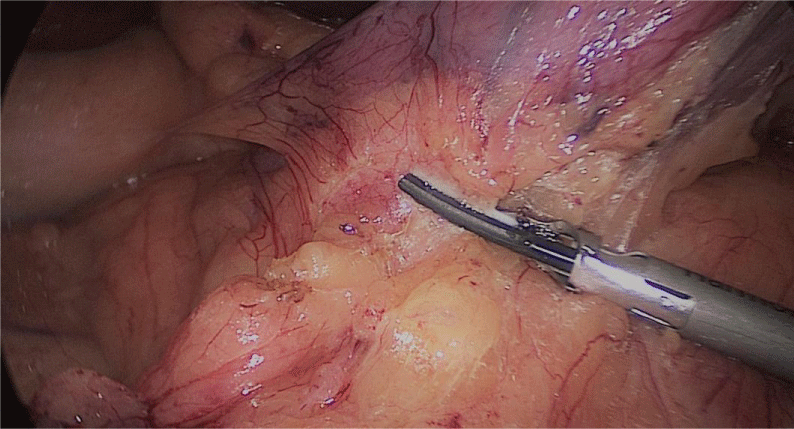
Figure 19:
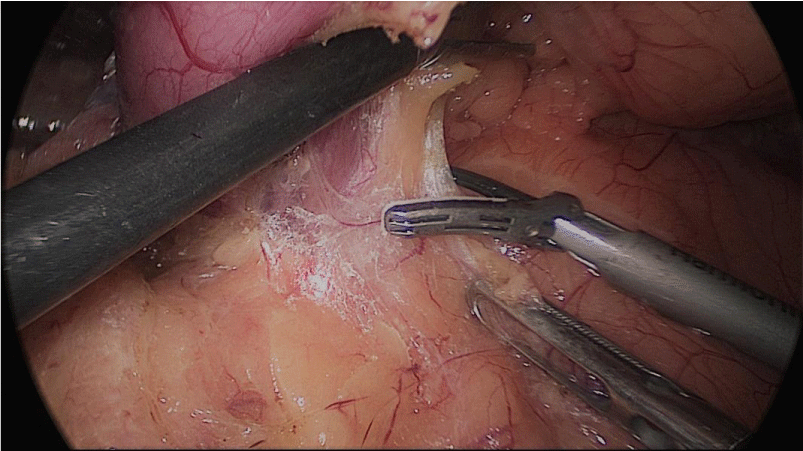
Figure 20:
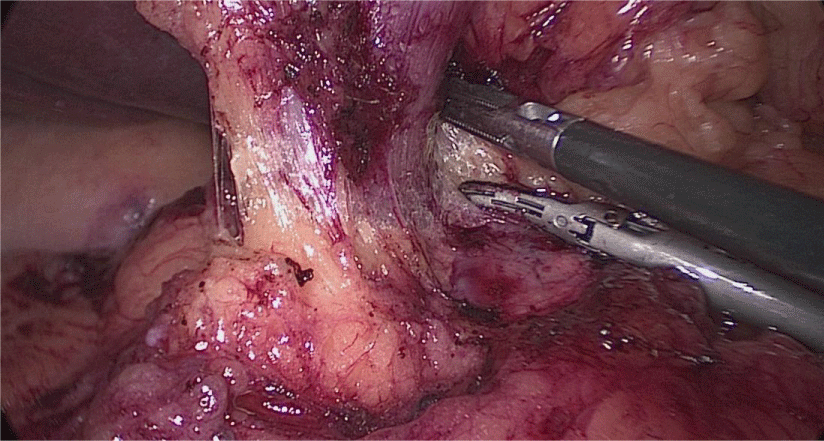
Figure 21:
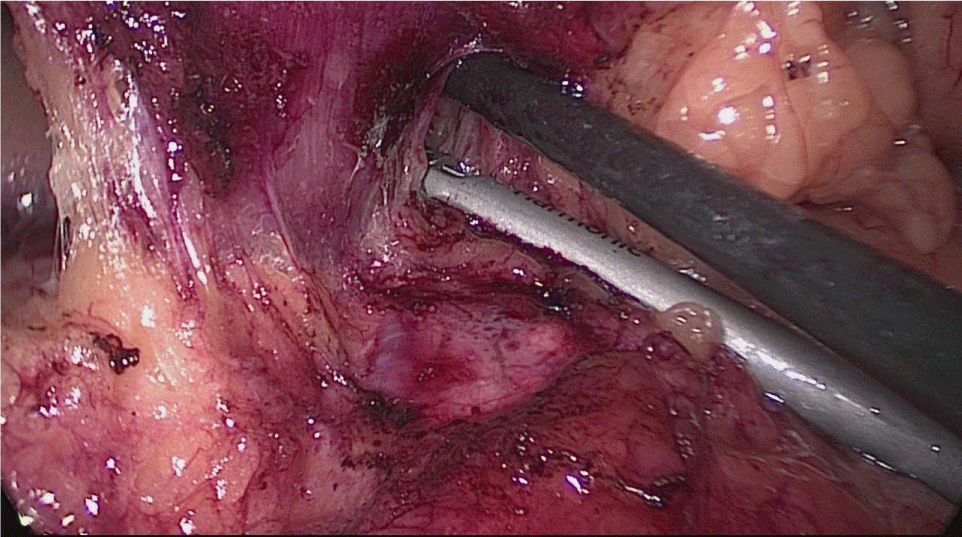
Figure 22:
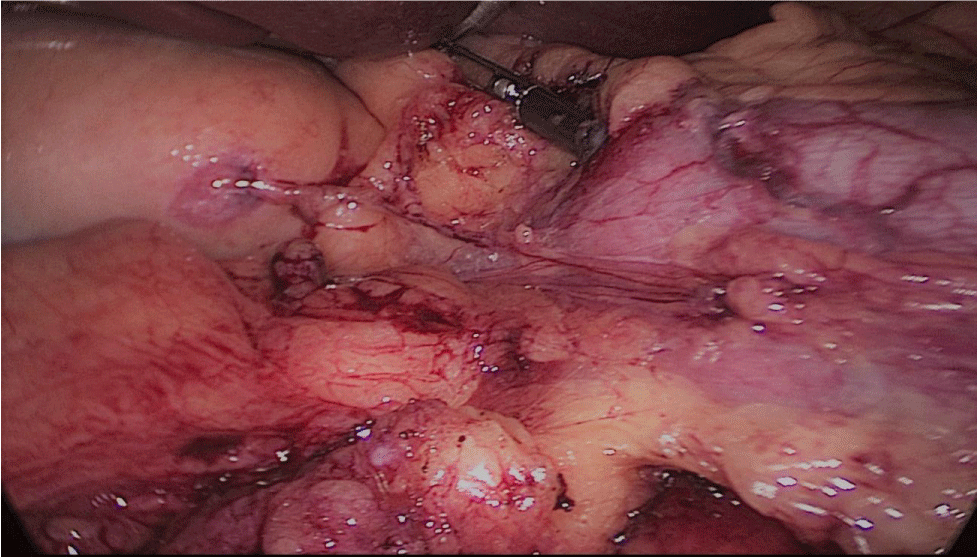
Figure 23:
Once we have done the retro-duodenal tunnel, a 60 mm endo stapler is introduced by the surgeon from the right through the 12 mm trocar and passes very gently along the tunnel. And then the duodenum is divided. The distal duodenum stapler line is reinforced with a 3/0 mono plus suture (Figures 24-27).
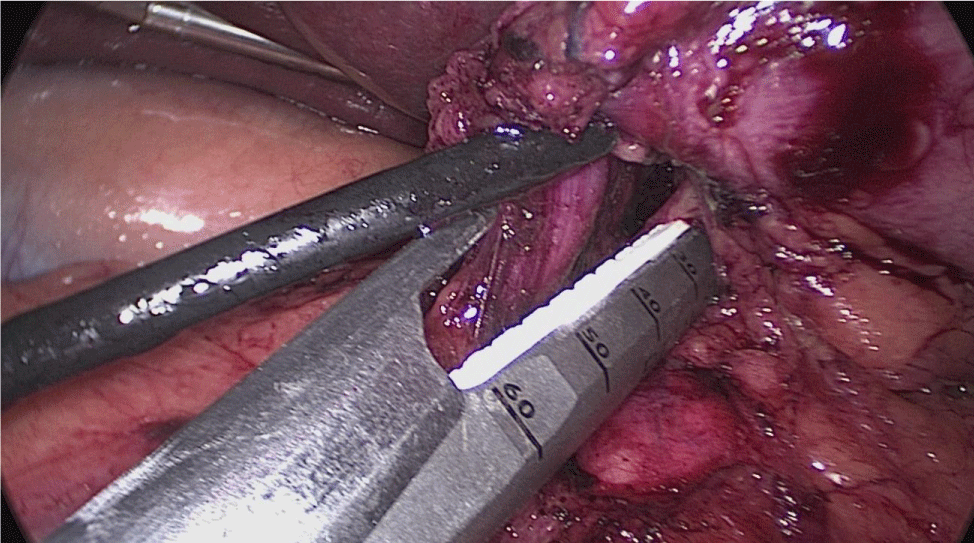
Figure 24:
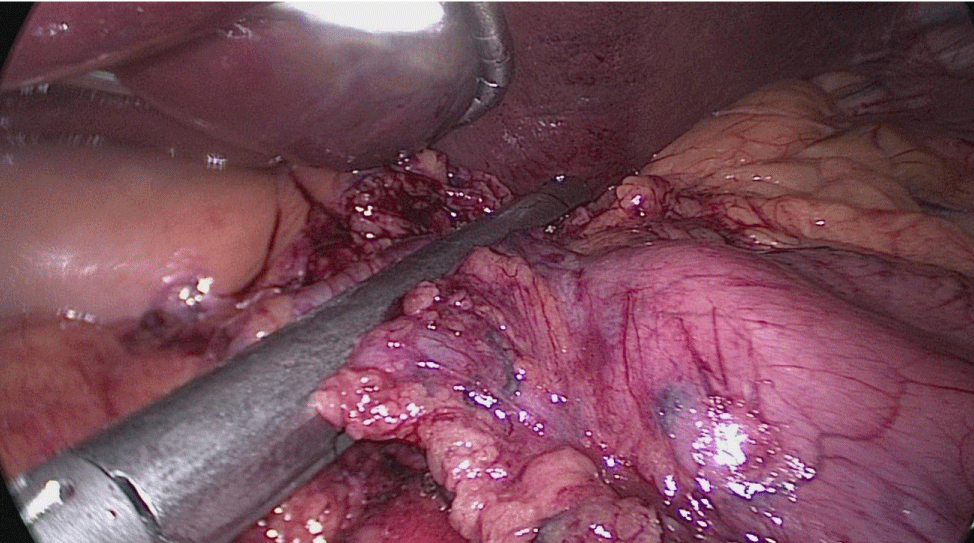
Figure 25:
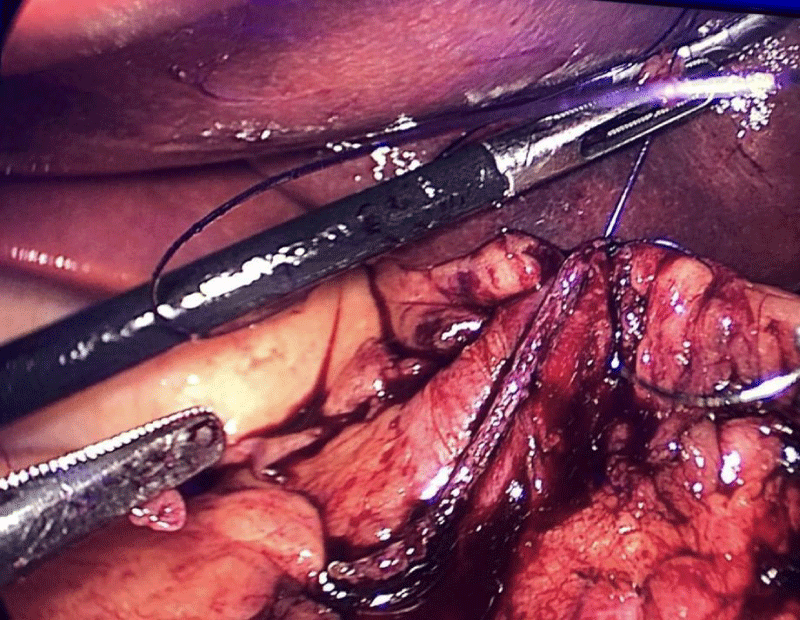
Figure 26:
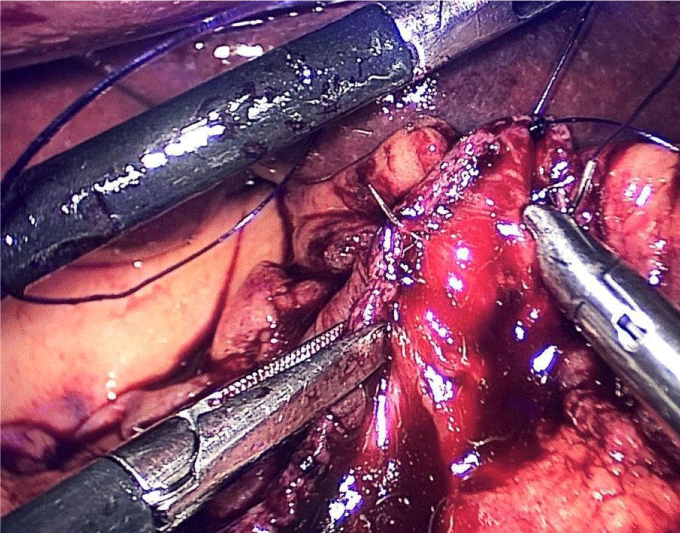
Figure 27:
The 12 mm bougie is passed now through the pylorus into the duodenum.
The stomach division is started 2 cm proximal to the pylorus, by applying a 60 mm stapler inserted through the right side 12 mm port (the 1st two cartridges must be green or violet, depending on if they are Covidien or Echelon).
The mobility of the bougie is mandatorily checked before firing the stapler. In order to avoid stenosis, care must be taken at the level of the incisura. Gastric division progresses all along using 60 mm gold cartridges.
At this point is critical to expose properly the anterior and the posterior aspect of the stomach using lateral traction by the assistant on the left. This prevents a corks-crew shape of the sleeve as well as avoids leaving a large posterior fundus and the risk of postoperative gastroesophageal reflux. A Methylene blue dye test is always done to check for leaks at the esophagogastric junction and all along the staple line (Figures 28-34).
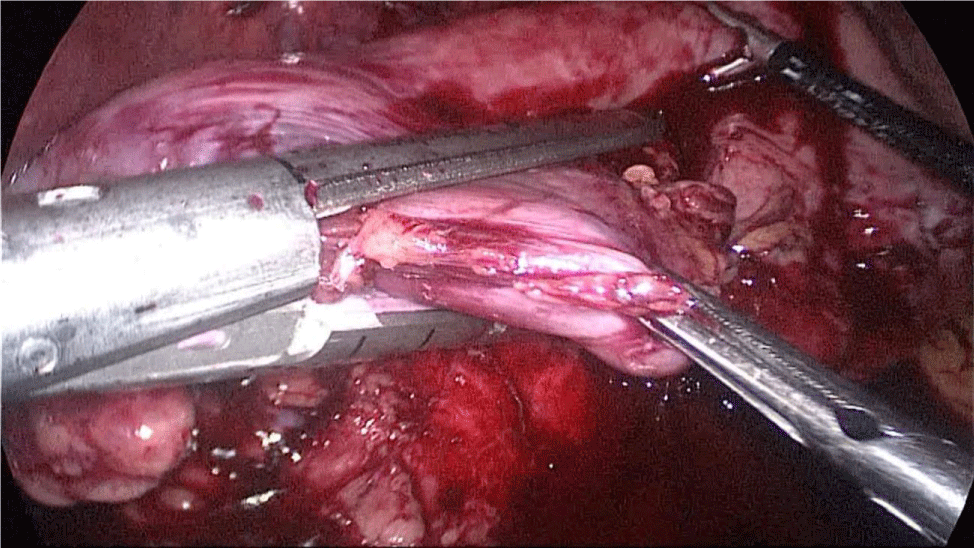
Figure 28:
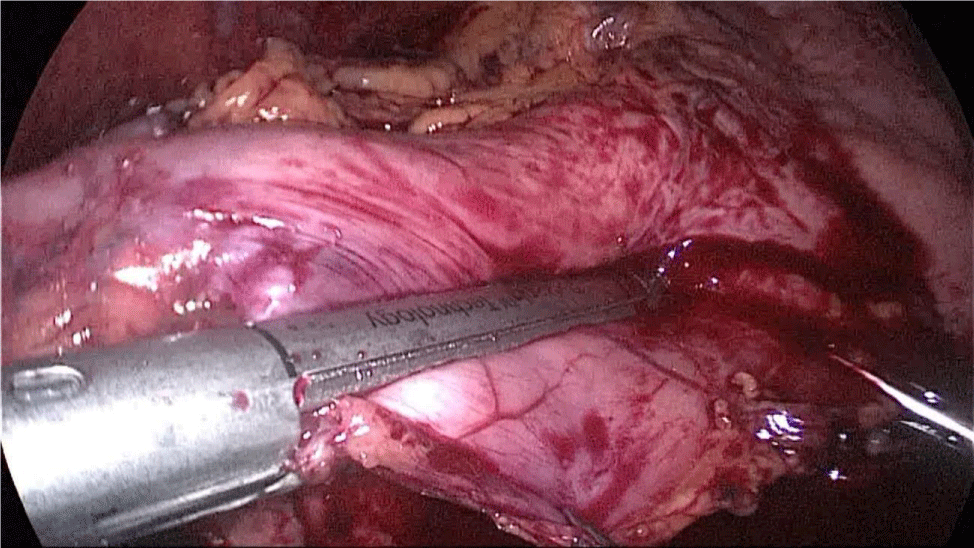
Figure 29:
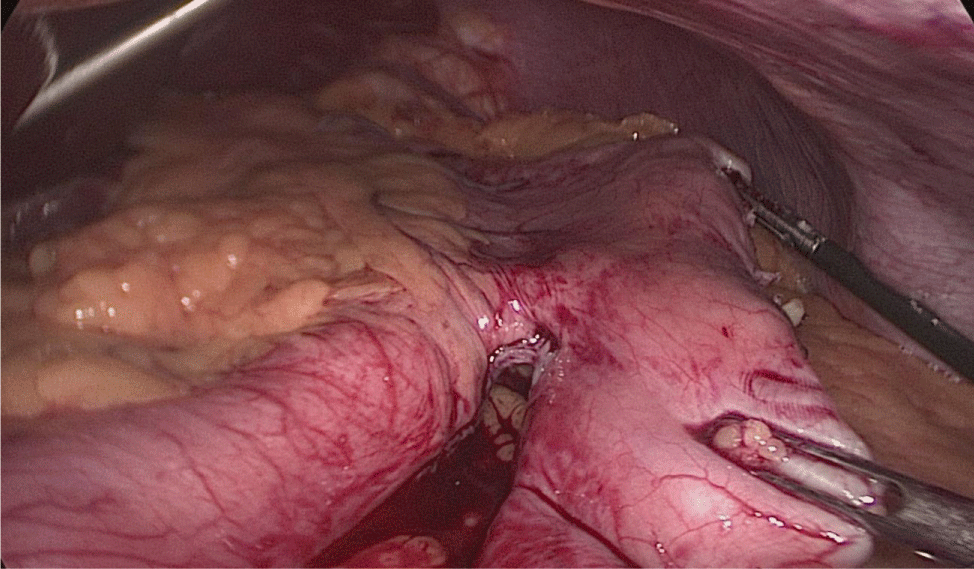
Figure 30:
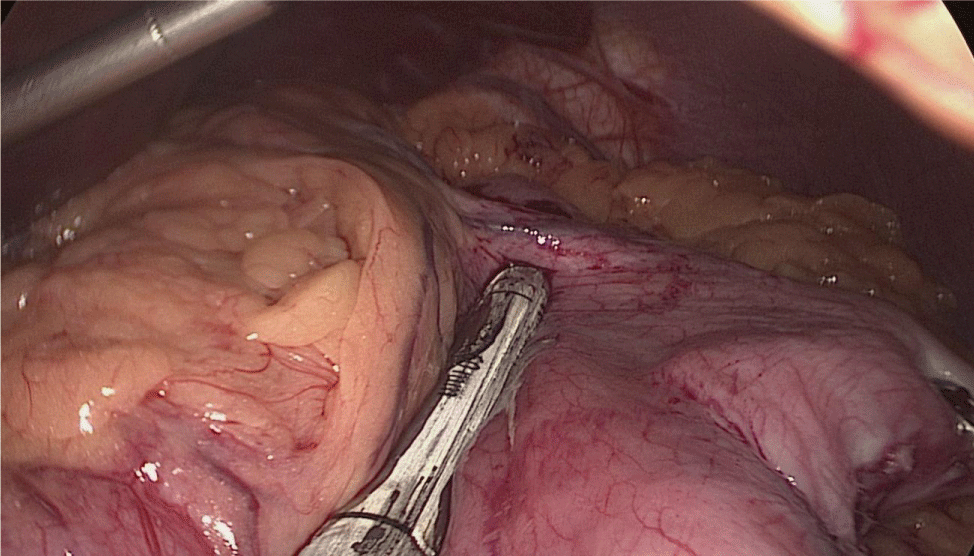
Figure 31:
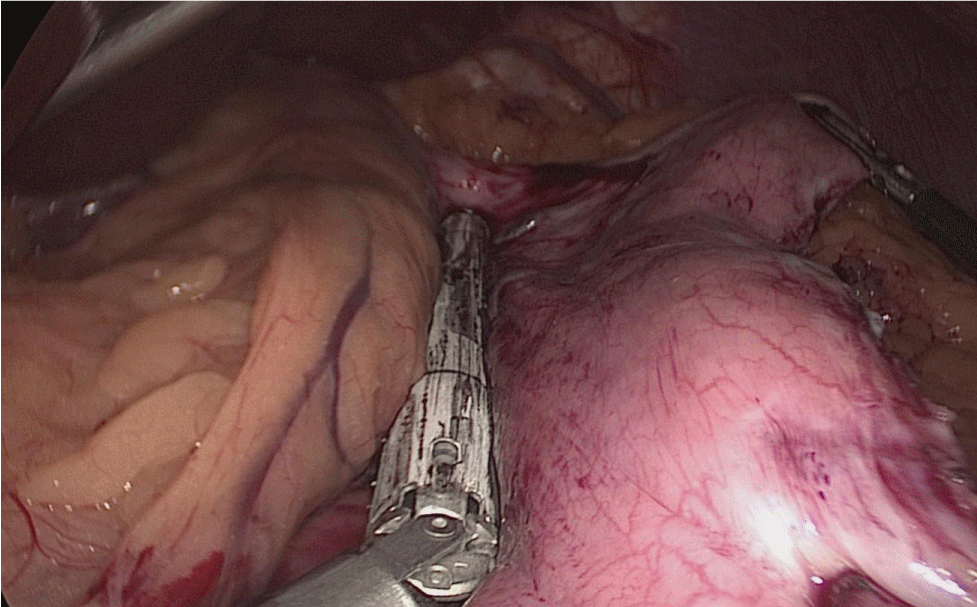
Figure 32:
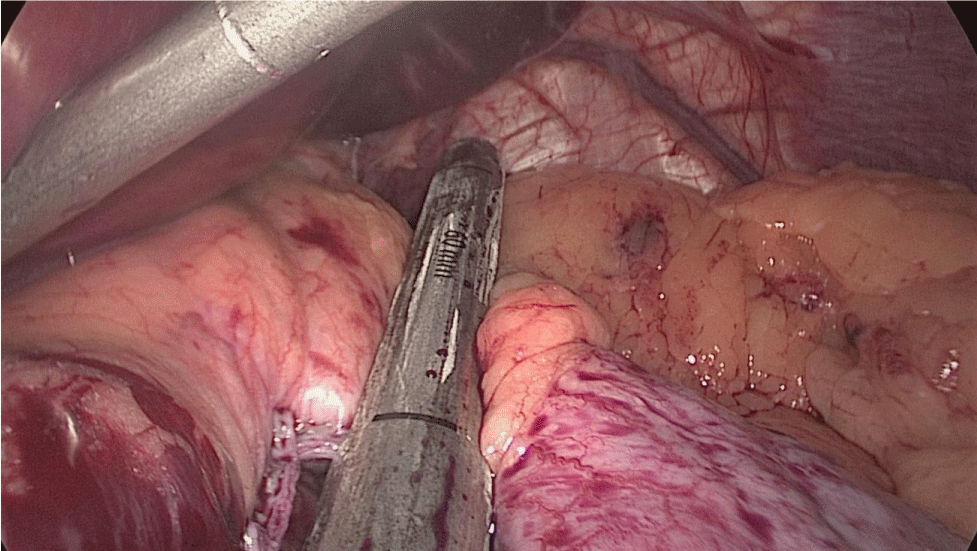
Figure 33:
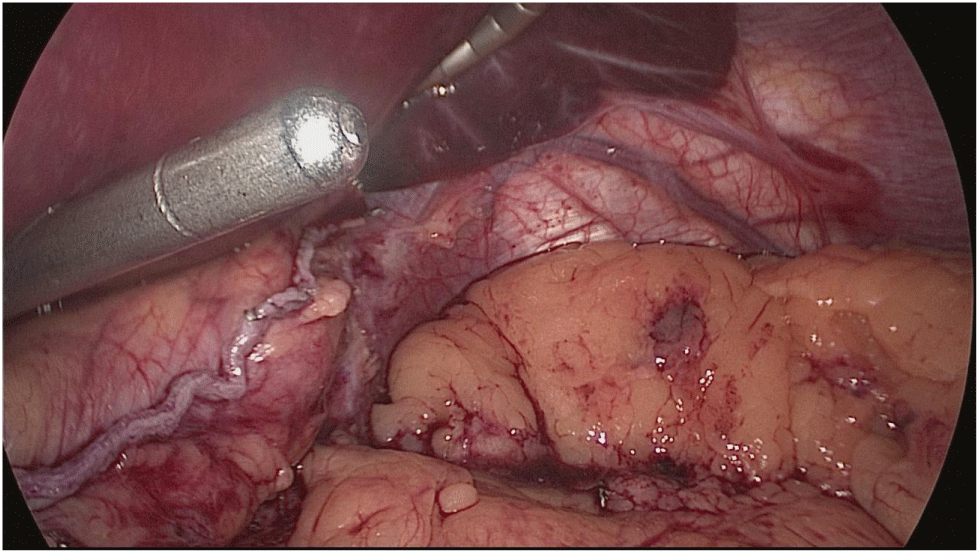
Figure 34:
The surgeon reinforces the long gastric stapler line with a 3/0 mono plus run suture (Figures 35-38). To do so we create 1st, a Sliding self-locking loop at the end of a 3/0 Monoplus thread. The needle holder is passed by this loop to grasp the suture close to the needle before entering the abdominal cavity.
The needle holder is introduced by the 12 mm port and the Stich starts high up at the angle of His holding 1st the omentum and then 2nd the serosa at both sides of the suture-line. We hold again the suture close to the needle and pass the thread through the sliding loop. This 1st stitch becomes self-locked with the principles of the Aberdeen knot: the more you pull, the more the knot is locked. The rest of the suture is a sero-serosal running suture taking the omentum in every stitch and finally, an Aberdeen knot ends the suture line.
The sliding self-locking 1st stitch is an easy maneuver that avoids the existence of foreign body material in a delicate part of the stomach. The aim of this running suture is to stabilize the gastric tube on the one hand and to make secure hemostasis (Figures 35-38).
The Biliopancreatic diversion part of the operation is done by dividing the omentum for easier and tensión-free lifting of the jejunal loop Figure 39.
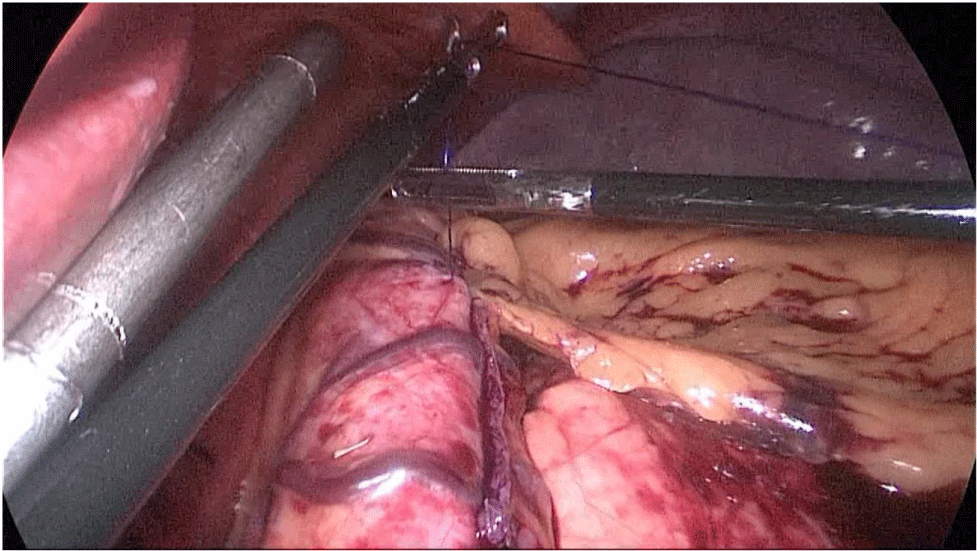
Figure 35:
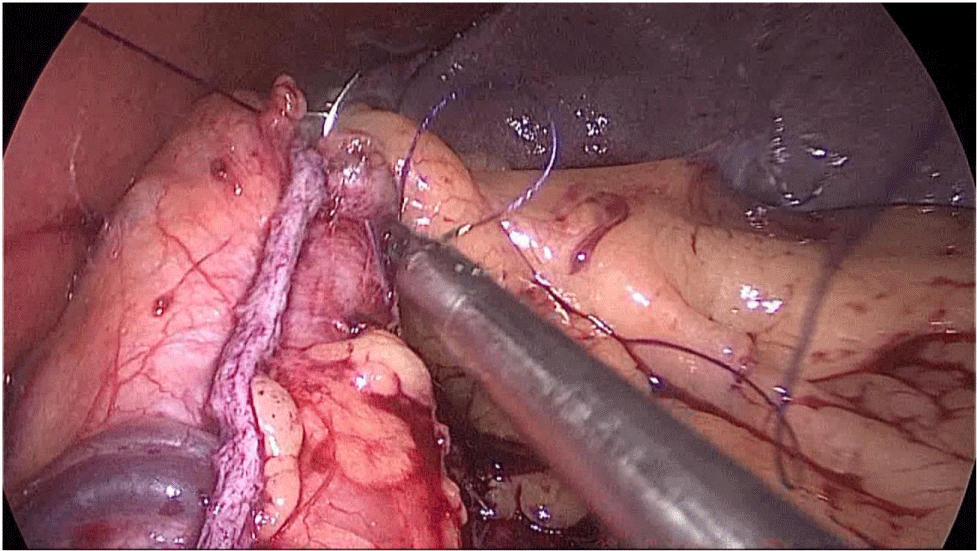
Figure 36:
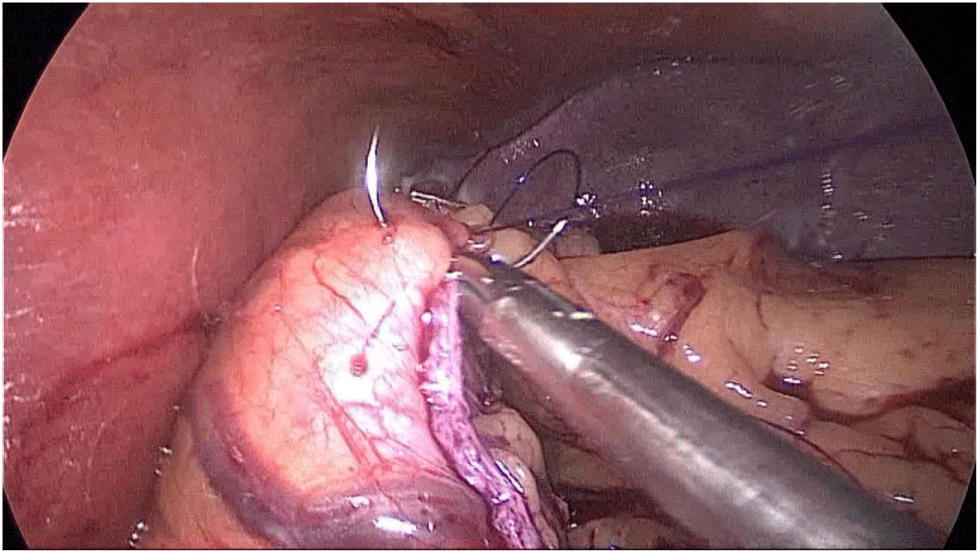
Figure 37:
Figure 38:
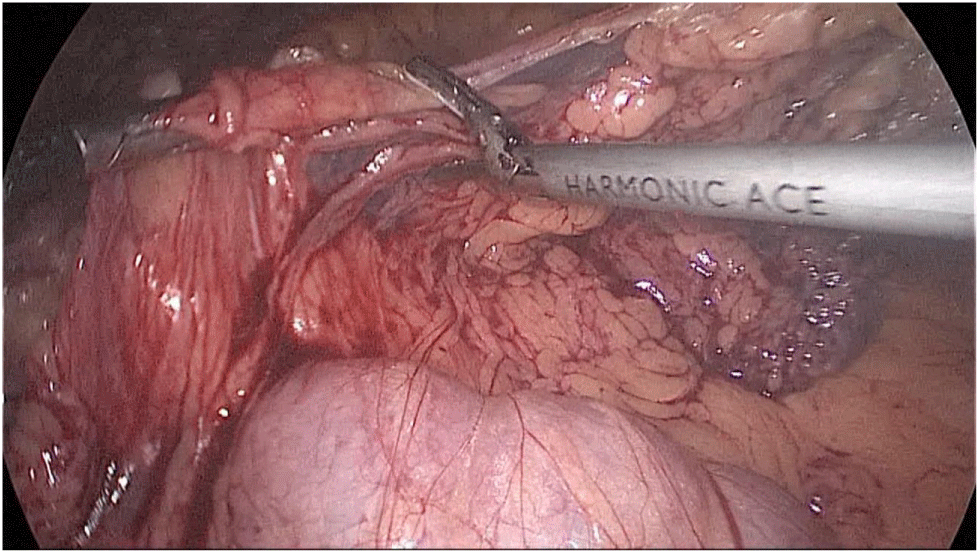
Figure 39:
The patient is changed to a Trendelenburg position and the surgeon and assistants all move to the head of the patient.
The whole length of the small bowel is measured using 5 cm by atraumatic marked forceps, starting at the ileocecal valve. A 100 cm common-channel (CC) is marked using one distal and two proximal clips. The 2nd loop of 150 cm is measured further up to 250 cm, and then a mesenteric window is created with the harmonic scalpel. The small bowel is then transected with a 60 mm stapler.
The bowel end located on the right (distal ileal end) is moved up over the mesocolon becoming the Alimentary Limb (AL) (Figures 40-47).
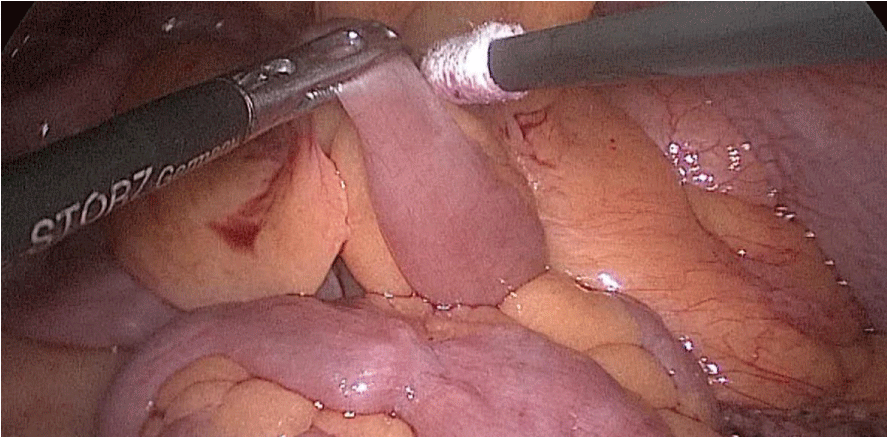
Figure 40:
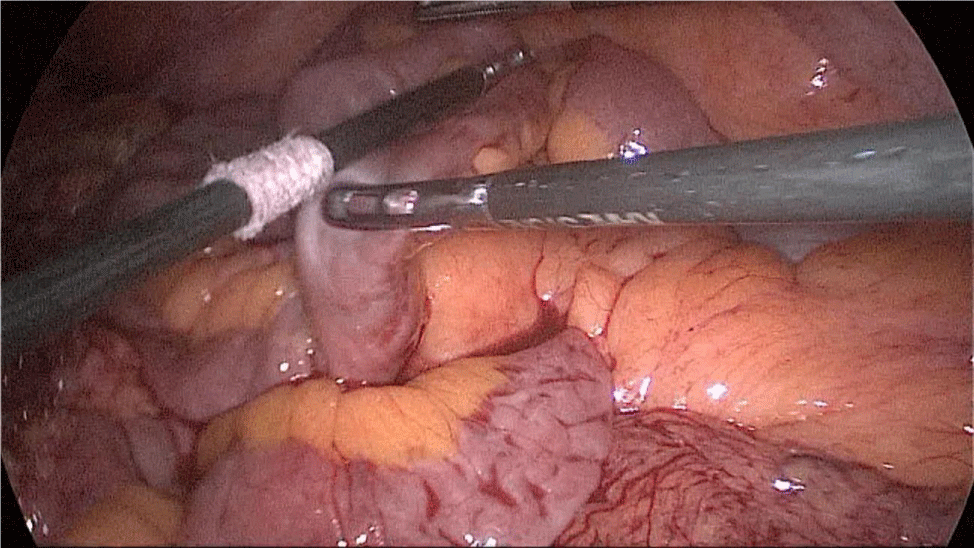
Figure 41:
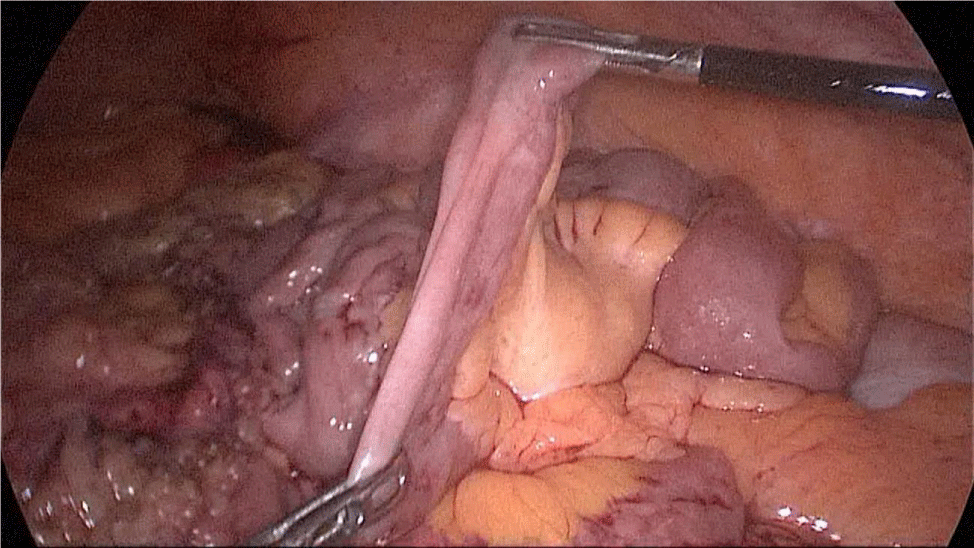
Figure 42:
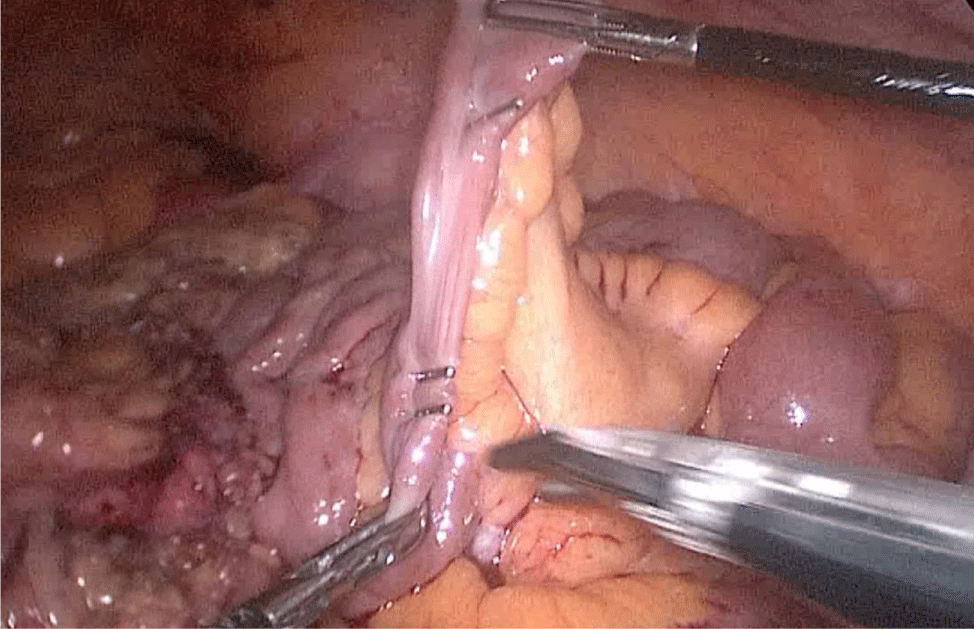
Figure 43:
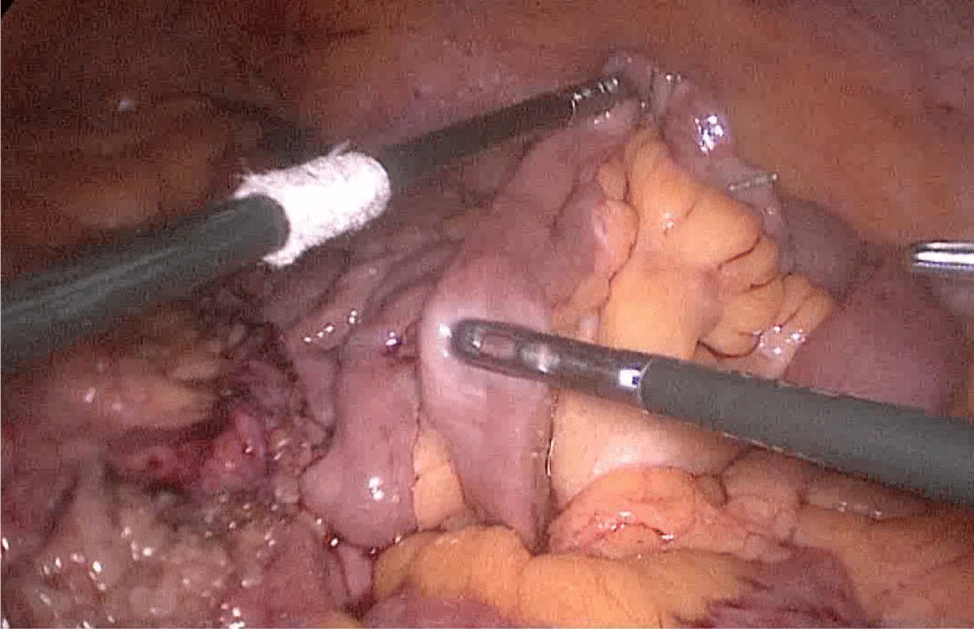
Figure 44:
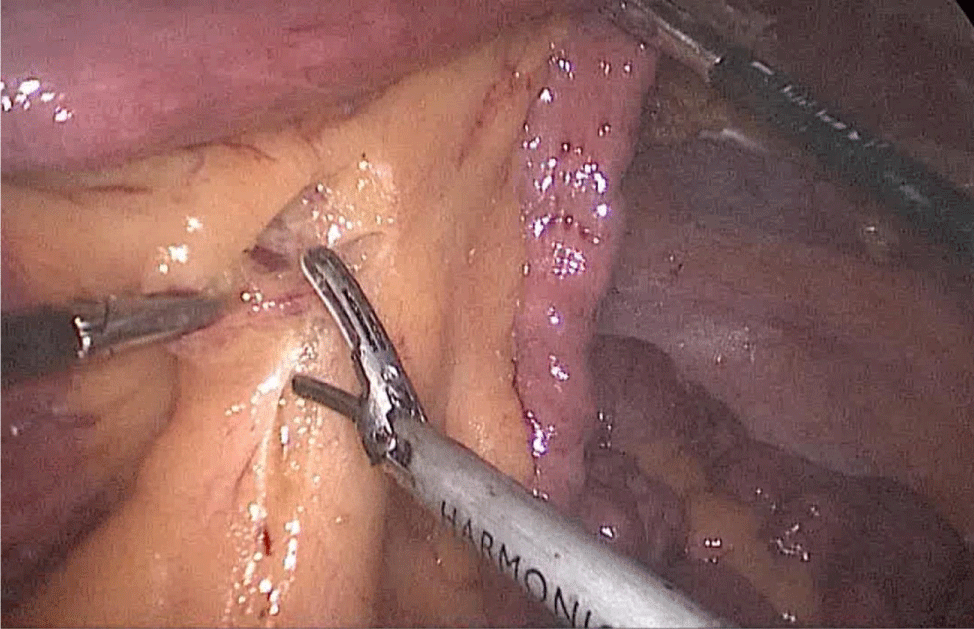
Figure 45:
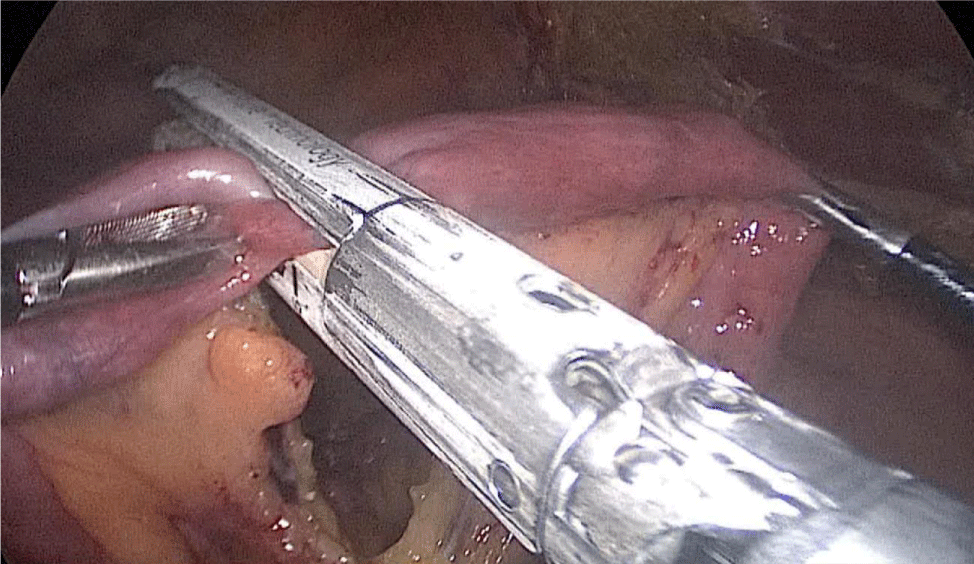
Figure 46:
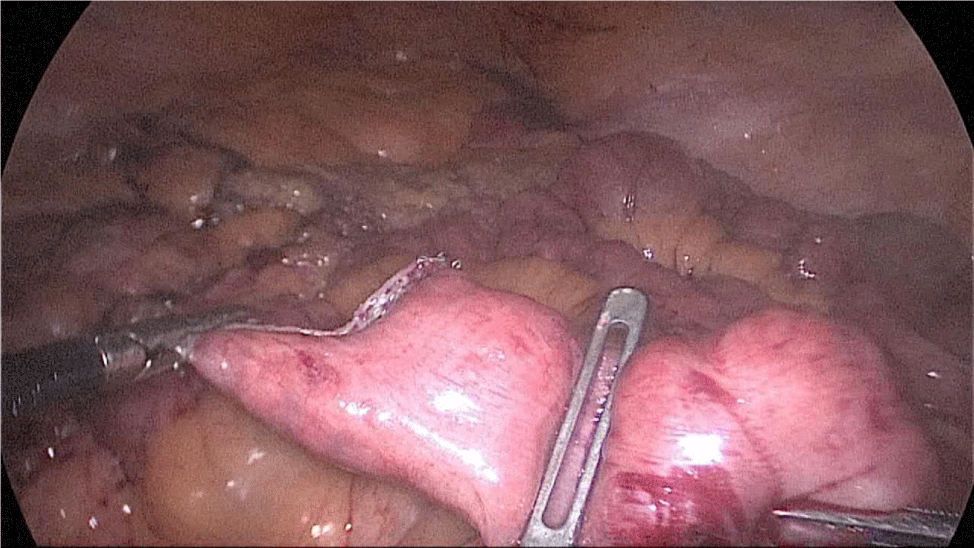
Figure 47:
The bowel end located on the left (proximal ileal end) will be therefore the biliopancreatic limb (BPL). Opening the BPL near de stapler line using the harmonic stapler is the next maneuver. Then, the surgeon follows the alimentary limb (AL) distally until the previous clips are identified.
A hand-sewn end-lateral anastomosis is done using two threads: one 15 cm. and the other 13 cm. long 3/0 Monoplus sutures. The long one is used for de posterior layer and the short one for the anterior. The suture is finished when both threads are tied (Figures 48-52).
Finally, the mesenteric defect is close with a running 2/0 Propylene suture (Figures 53,54).
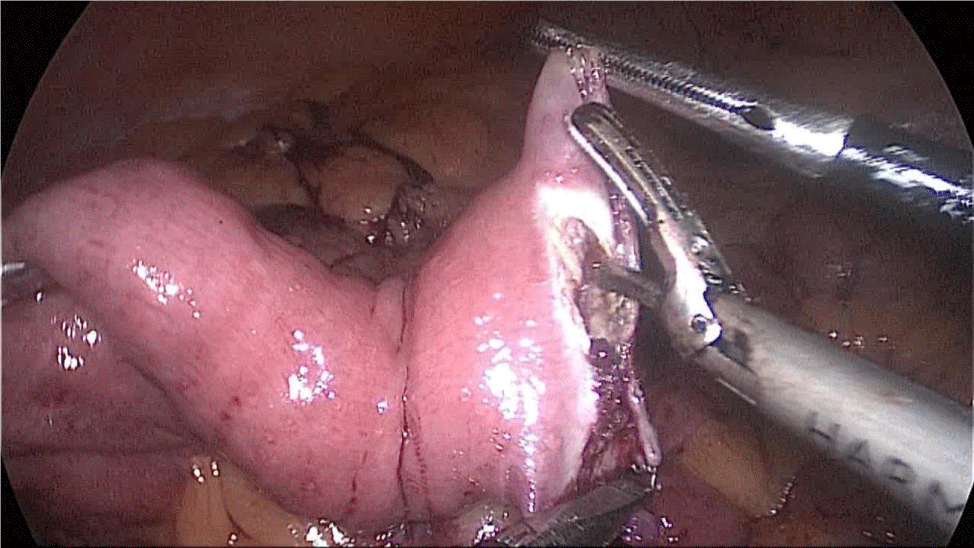
Figure 48:
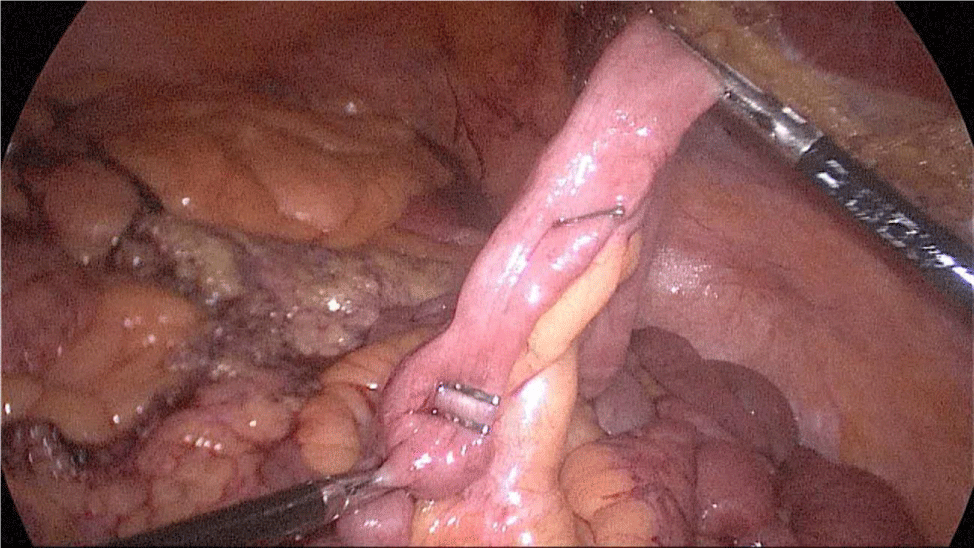
Figure 49:
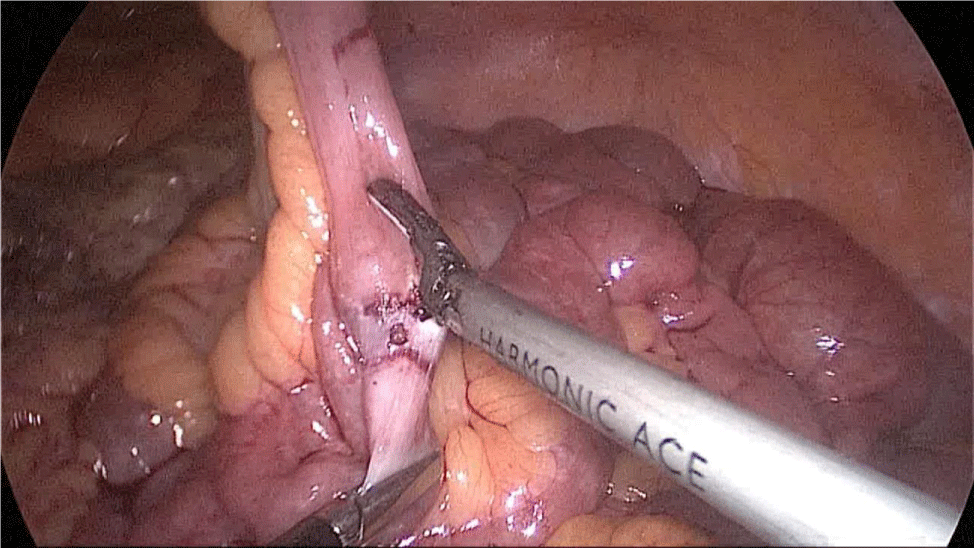
Figure 50:
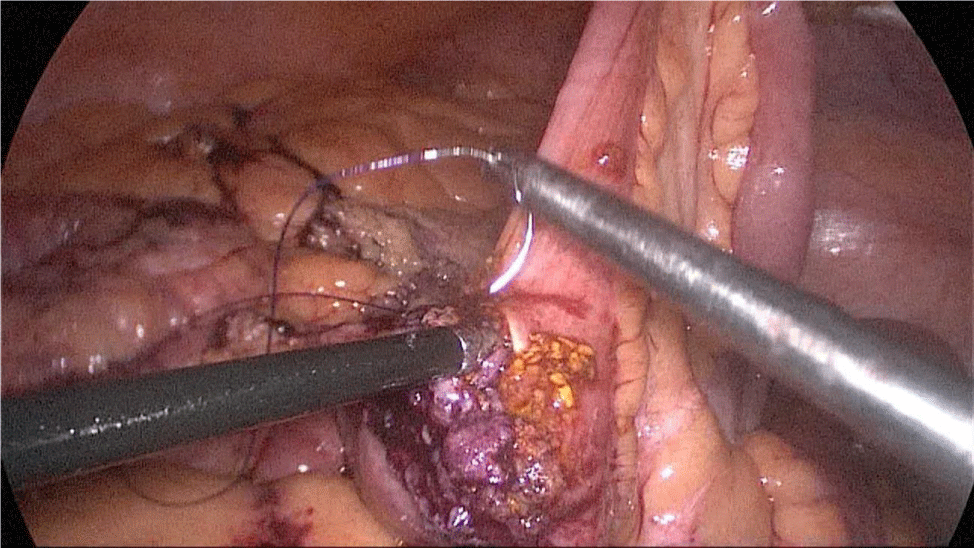
Figure 51:
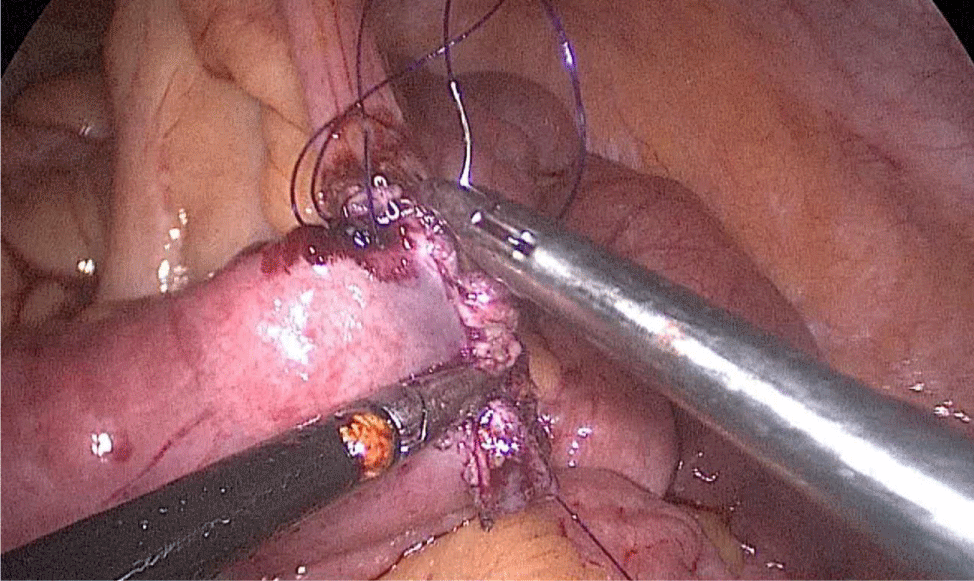
Figure 52:
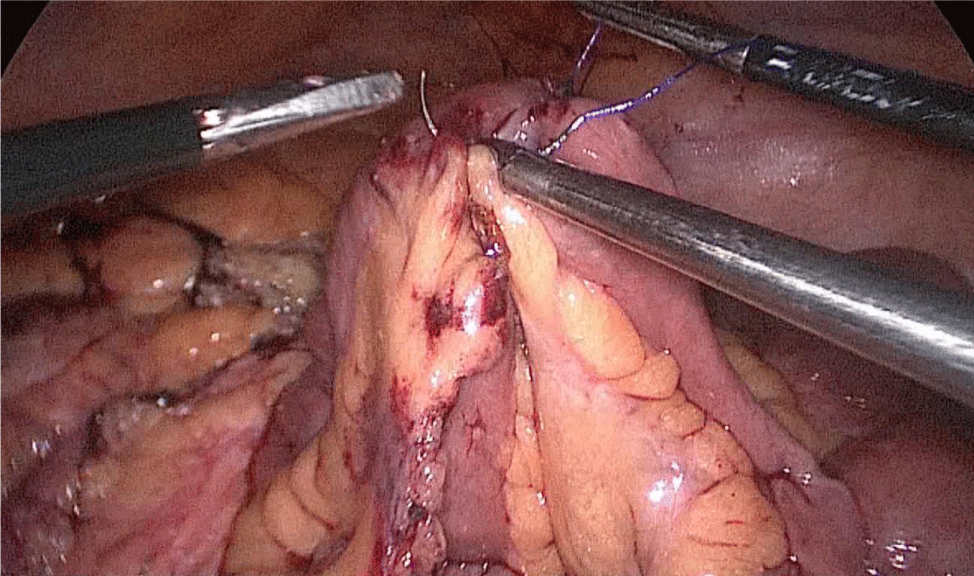
Figure 53:
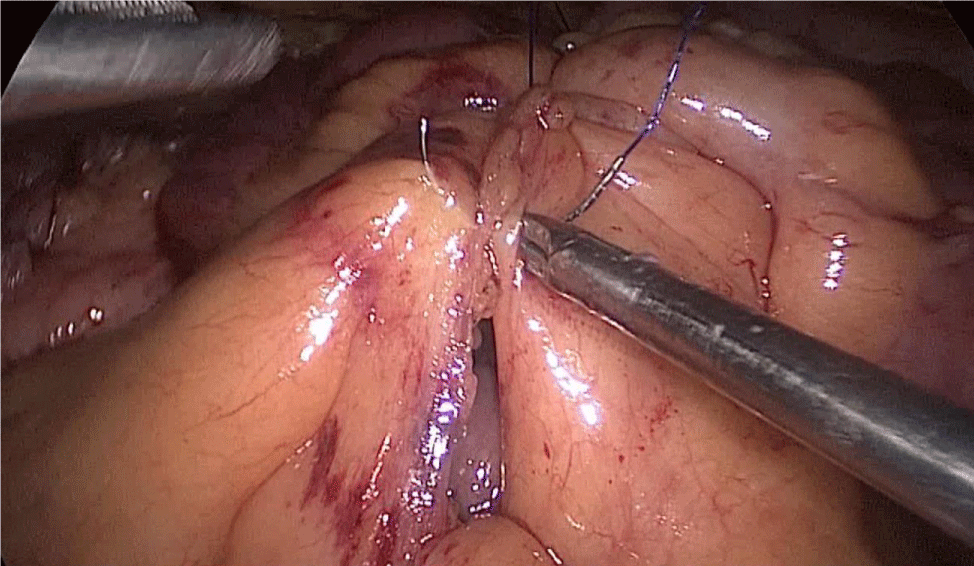
Figure 54:
3rd Step: Duodeno-ileal anastomosis. The patient’s position moved again to an anti-Trendelenburg position and the surgeon moved between the patient legs. The AL had been moved up to an ante colic position.
We use a 2/0 silk stitch to aproxímate the duodenum and ileus, and then the assistant on the left side holds it and keeps the anastomosis stable (Figure 55).
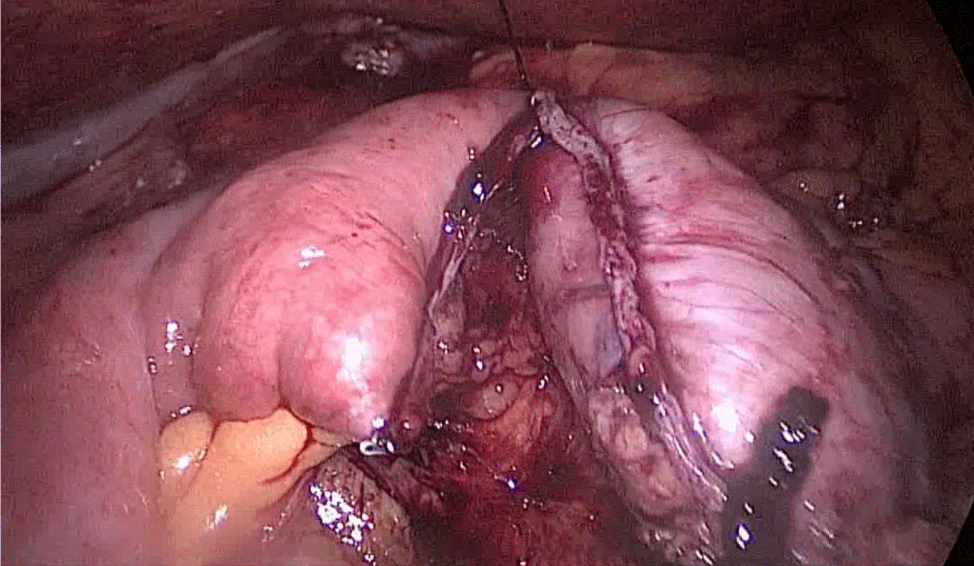
Figure 55:
There are several ways to perform anastomosis, but we prefer two layers of hand-sewn termino-terminal anastomosis. The posterior layer is 1st done with a 3/0 mono plus running suture, without incorporating the staple lines and ensuring the apposition of the two anastomotic stumps.
We begin from the superior angle and progress until the end of both staple lines meet. We finish again with an Aberdeen Knot. The assistant on the left holds the end of this suture (Figures 56,57).
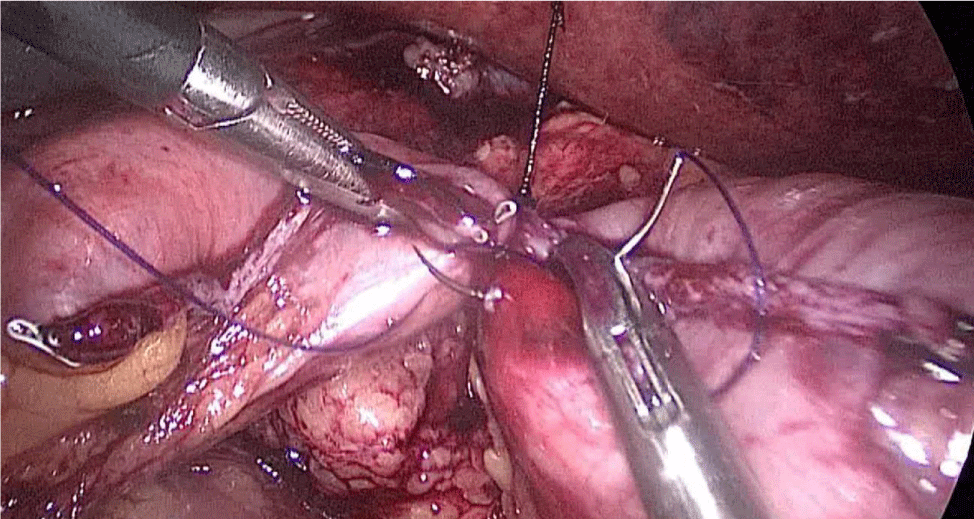
Figure 56:
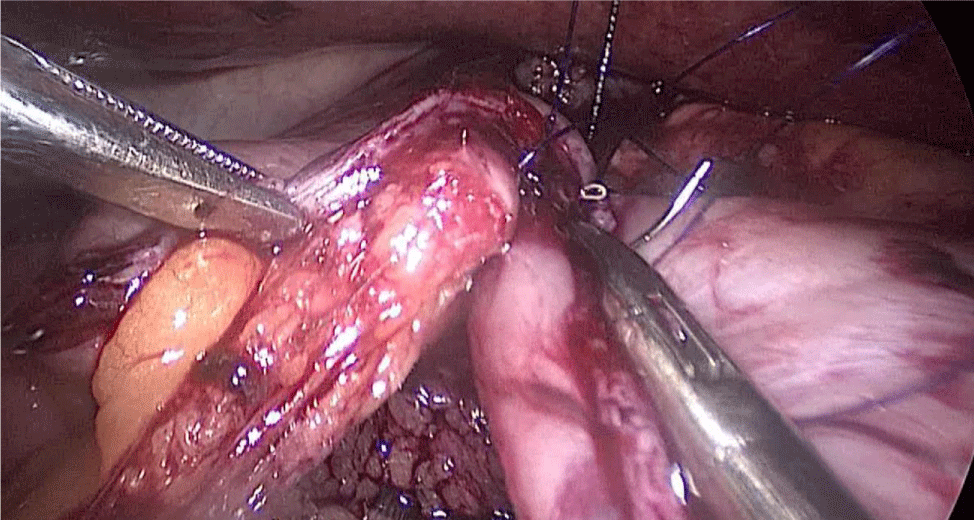
Figure 57:
Then, we open the duodenum and the ileum 1 cm from the de staple line using the harmonic scalpel (Figures 58-60). For the inner layer we use two tied threads; one 21 cm and the other one 16 cm long. We use the long one for the posterior layer because we need to take big bites. On the other hand, the anterior inner layer is seromuscular only. The suture is finished by tying both threads and then the anastomosis is finally closed. The last anterior layer (optional) is a 3/0 monoplus running sero-serosal suture (Figures 61-68). We routinely place a nasogastric tube and a Methylene blue test is performed to check the anastomosis (Figures 69,70).
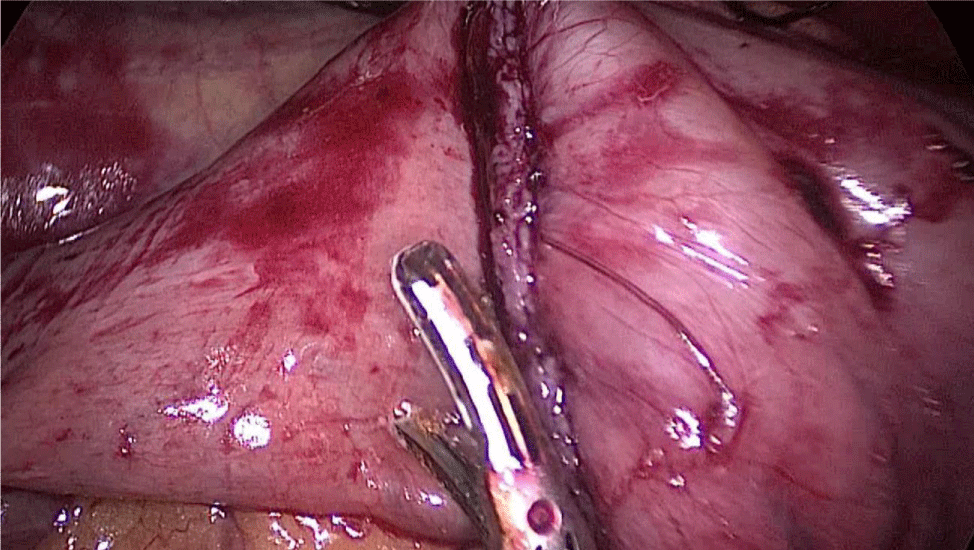
Figure 58:
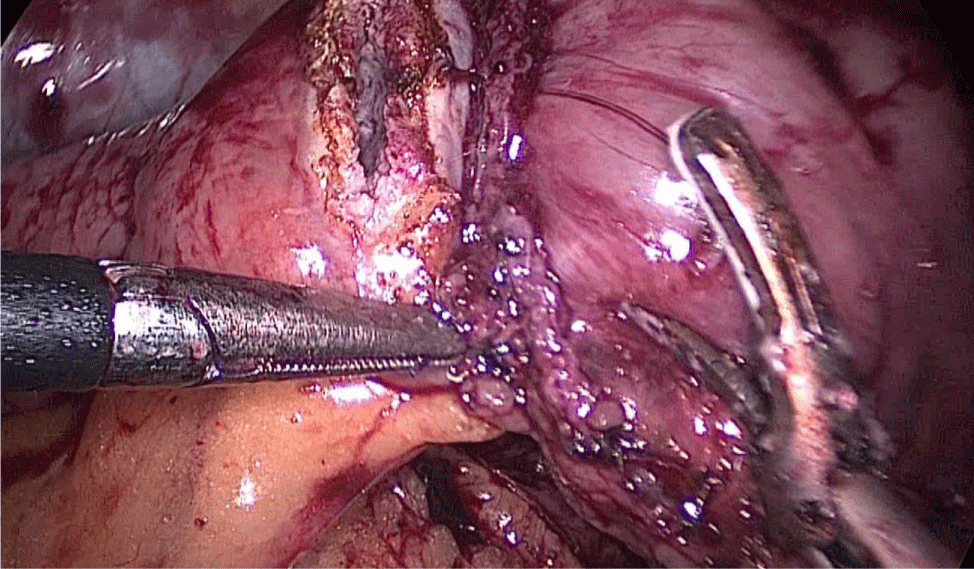
Figure 59:
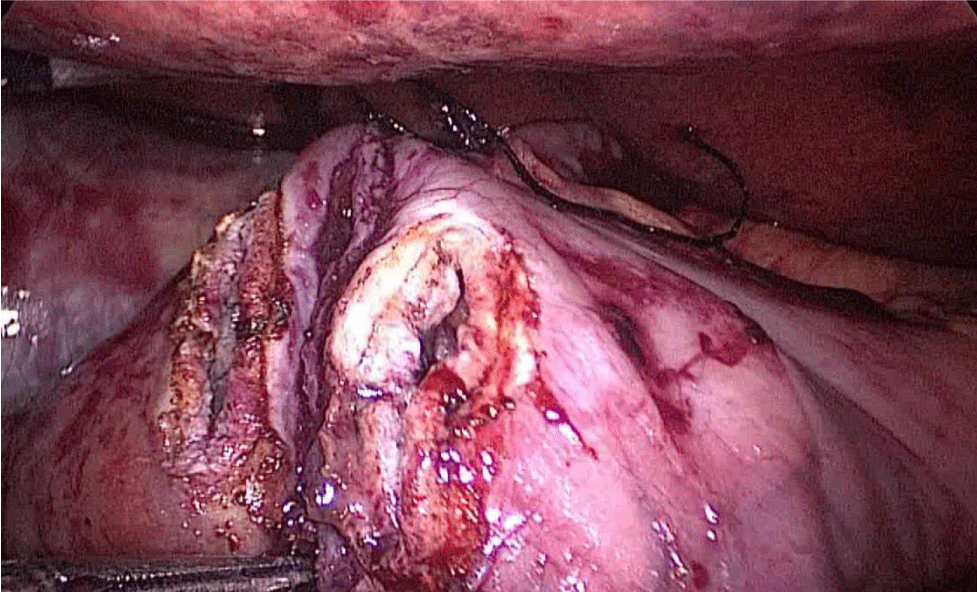
Figure 60:
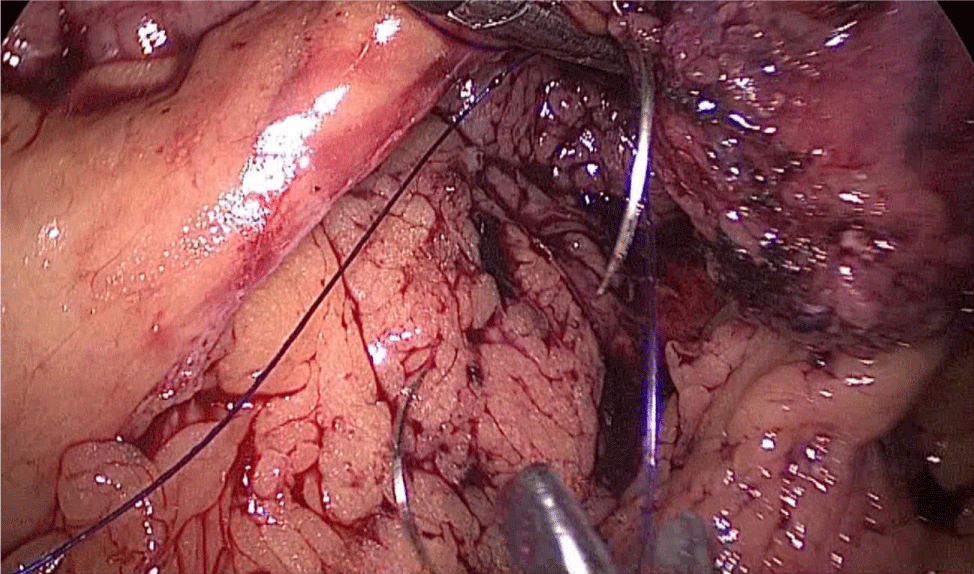
Figure 61:
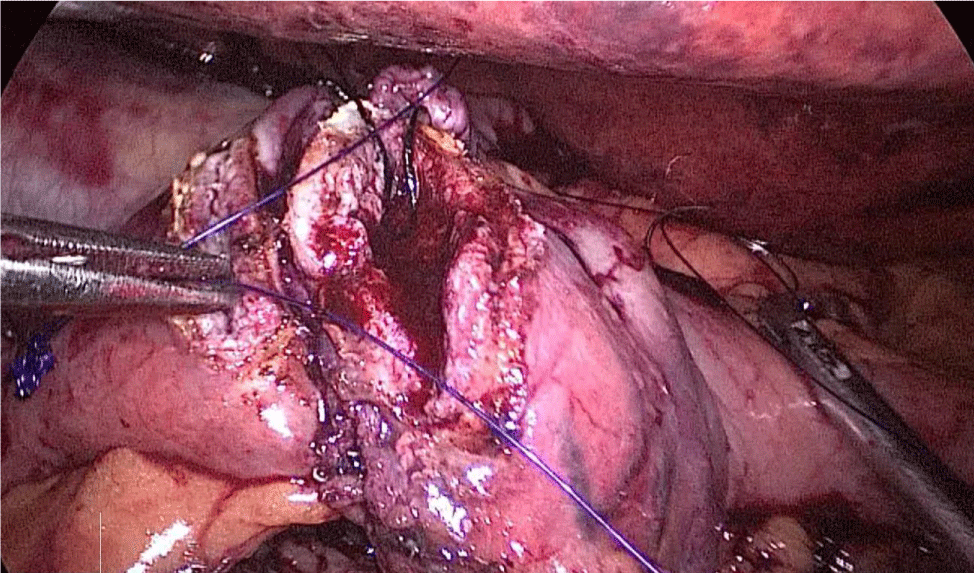
Figure 62:
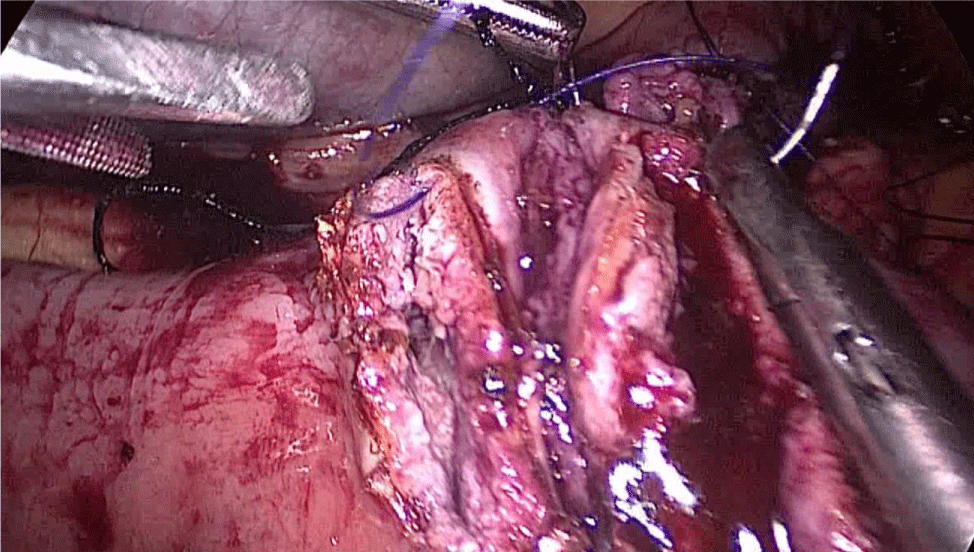
Figure 63:
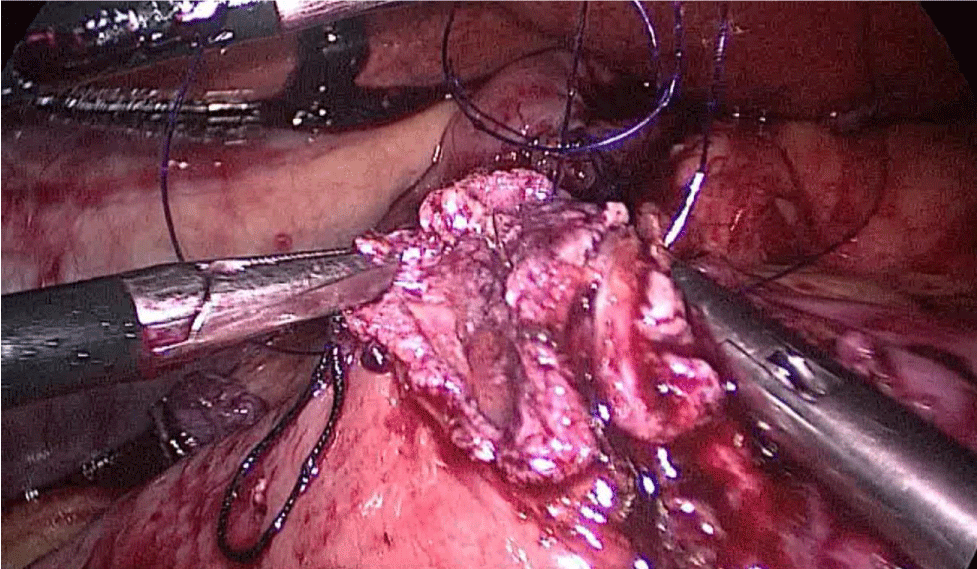
Figure 64:
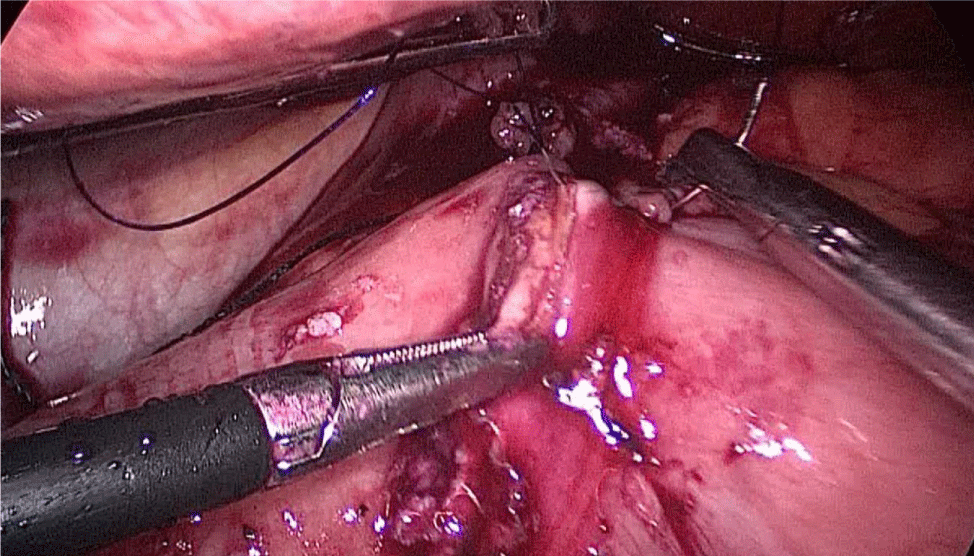
Figure 65:
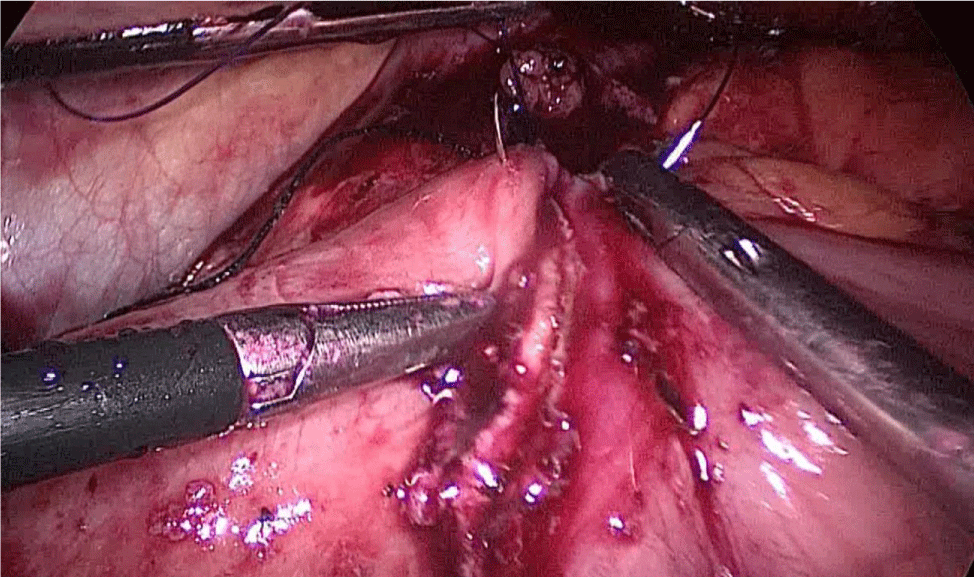
Figure 66:
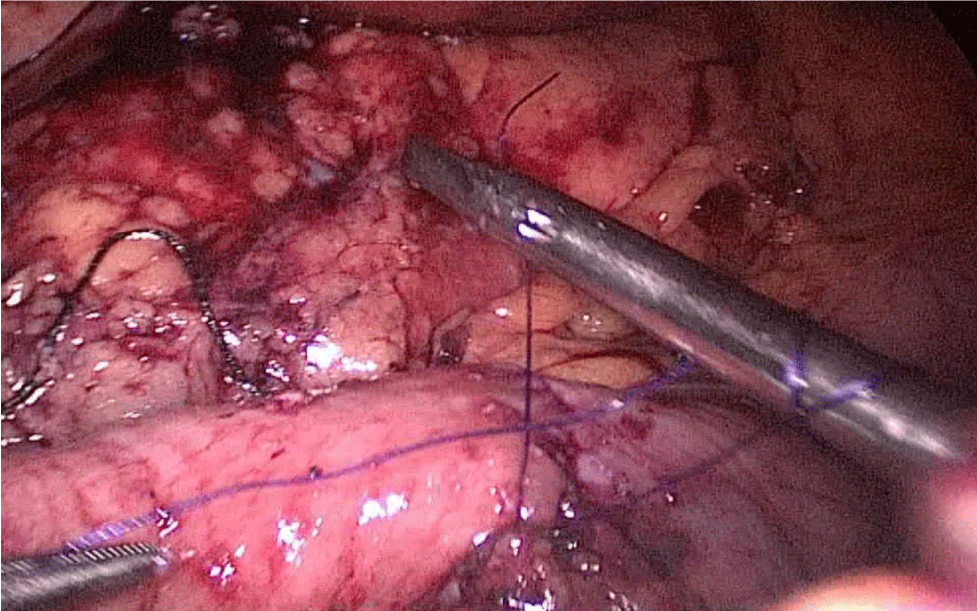
Figure 67:
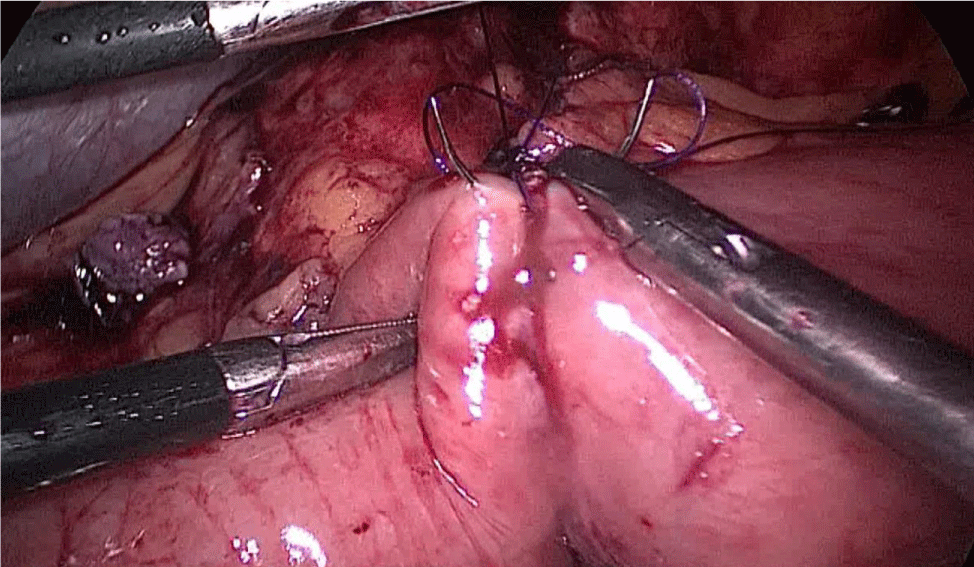
Figure 68:
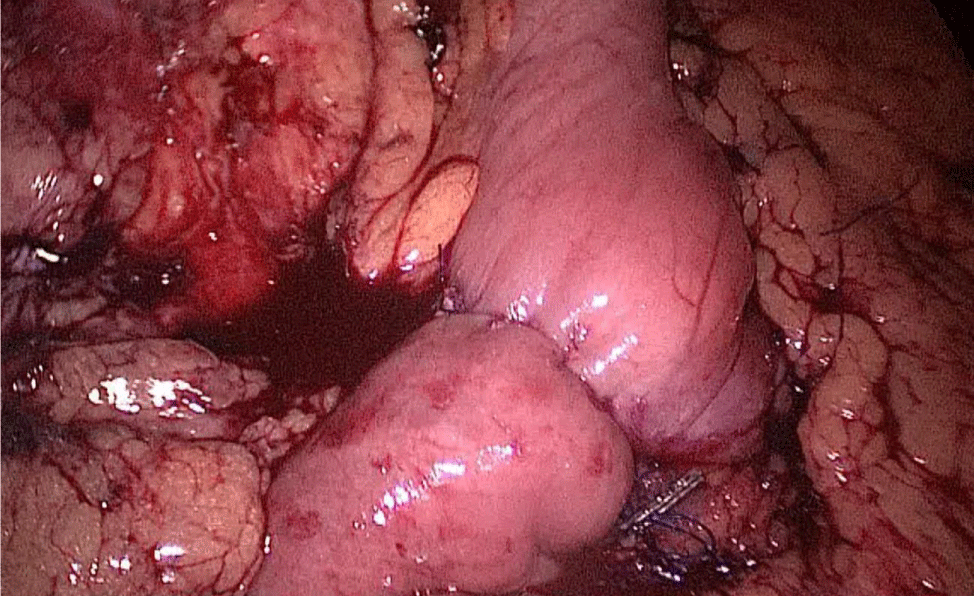
Figure 69:
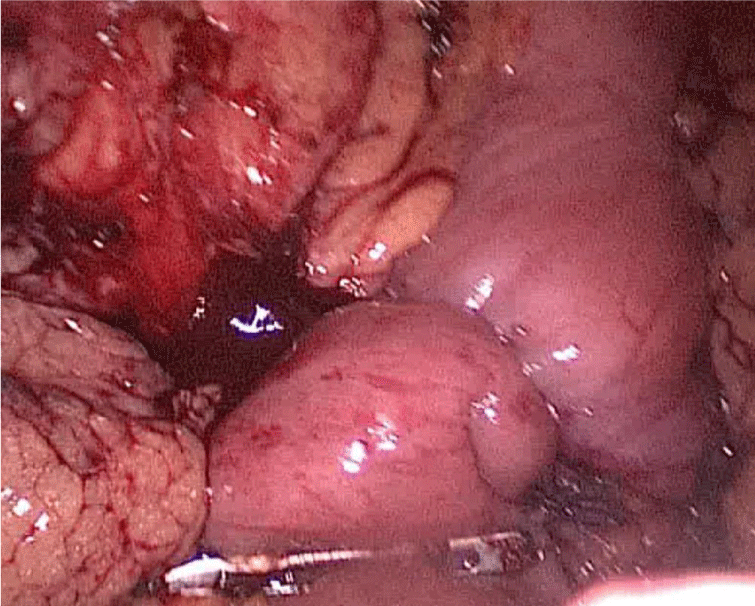
Figure 70:
The excluded stomach is removed by the 12 mm port on the right, and a Blake drain is left subhepatic, near the esophagogastric junction. We close the 12 mm muscular port under direct vision using a 0 Polypropylene Stich (Figures 71-74). The stomach is removed and the skin access closed.
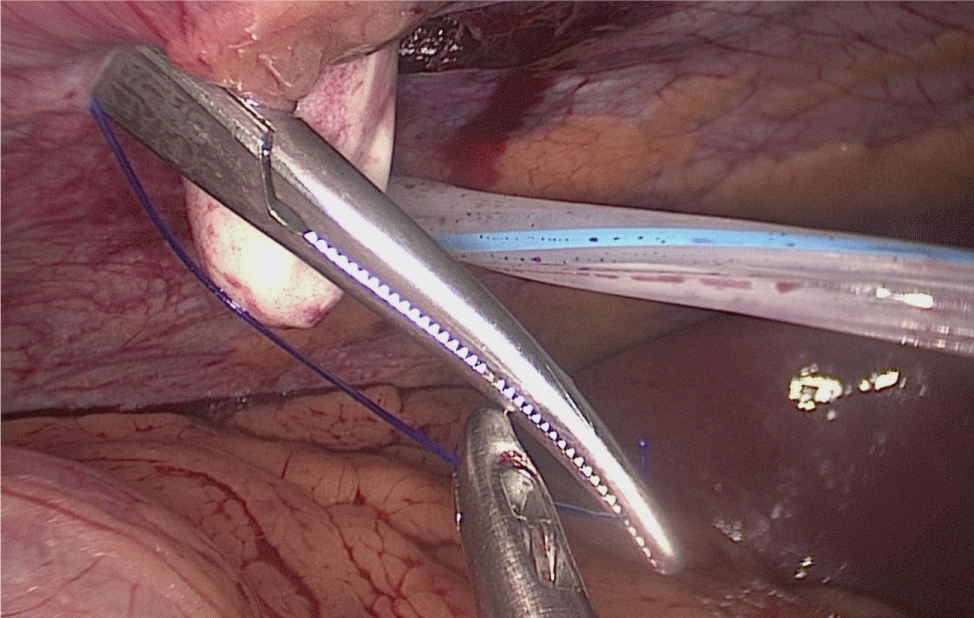
Figure 71:
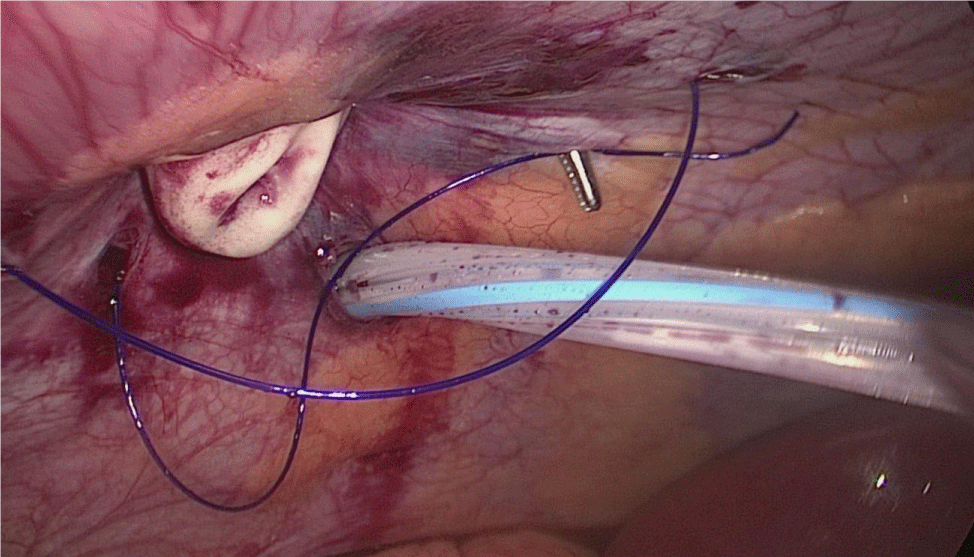
Figure 72:
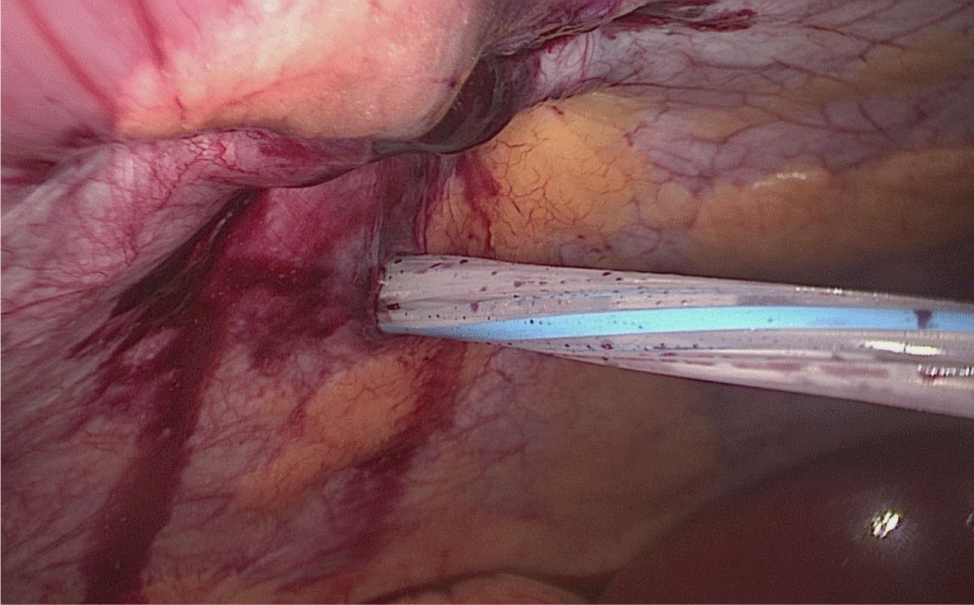
Figure 73:
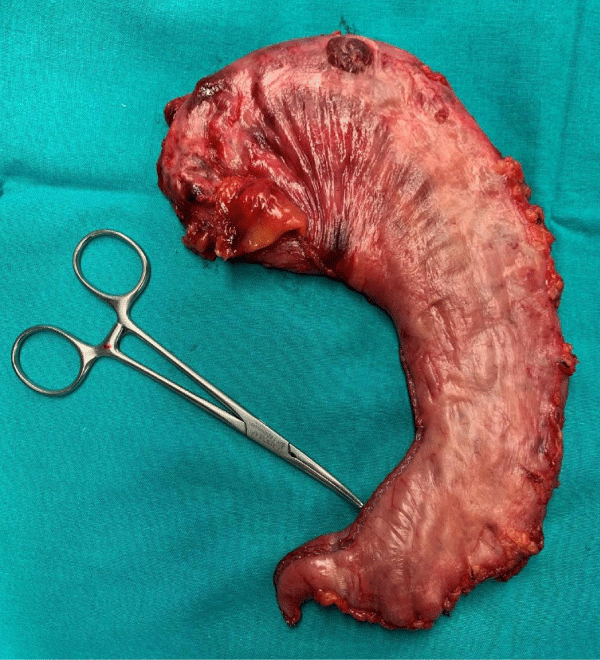
Figure 74:
- Hess DS, Hess DW. Biliopancreatic diversion with a duodenal switch. Obes Surg. 1998; 8: 267-282. https://pubmed.ncbi.nlm.nih.gov/9678194/
- Marceau P, Biron S, St Georges R, Duclos M, Potvin M, et al. Biliopancreatic diversion with gastrectomy as surgical treatment of morbid obesity. Obes Surg. 1991; 1: 381-387. PubMed: https://pubmed.ncbi.nlm.nih.gov/10775939/
- Marceau S, Biron S, Lagacé M, Hould FS, Potvin M, et al. Biliopancreatic diversion, with distal gastrectomy, 250 cm and 50 cm limbs: long-term results. Obes Surg. 1995; 5: 302-307. PubMed: https://pubmed.ncbi.nlm.nih.gov/10733816/
- Gagner M, Matteotti R. Laparoscopic biliopancreatic diversion with duodenal switch. Surg Clin North Am. 2005; 85: 141-149. PubMed: https://pubmed.ncbi.nlm.nih.gov/15619535/
- Won-Woo Kim, Gagner M. Laparoscopic vs. open biliopancreatic diversion with duodenal switch: A comparative study. J Gastrointest Surg. 2003; 7: 552-557. PubMed: https://pubmed.ncbi.nlm.nih.gov/12763415/
- Baltasar A, Bou R, Miro J, Bengochea M, Serra C, et al. Laparoscopic biliopancreatic diversion with duodenal switch: technique and initial experience. Obes Surg. 2002; 12: 245–248. PubMed: https://pubmed.ncbi.nlm.nih.gov/11975221/
- Serra C, Baltasar A, Bou R, Pérez N. Cruce Duodenal. Guías Clínicas de la Asociación Española de Cirujanos. Capítulo 13; 155-161.